oliviajone781's blog
If you are looking to get creative to show your patriotism for your Nation as it celebrates its Independence Day. Or If you are having people over to your house and you want them to notice how innovatively you are celebrating this year’s Independence Day, then you are clearly a person who is looking for ideas to help you with being a crafter. Especially if you already own a Cricut cutting machine, we are sure you can’t wait to craft projects for the 4th of July. So, this blog will provide you with easy Cricut 4th of July ideas to help you celebrate independence day by being creative.
1. Patriotic PinwheelsThe Patriotic Pinwheels are cute decorative pieces coming in red, white, and blue colors. While the Red and White pinwheels have stripes, the Blue one has stars. When they are put together, they become a patriotic centerpiece. The following steps will help you to make a pinwheel:
- Importantly, you need Red, White, and Blue papers (It is preferred to have thick sheets), Small Brands, Wooden Dowels, A hot glue gun, and, most importantly, a Cricut cutting machine.
- First, you need to upload the pinwheel design on the Design Space. Once the pinwheel images are uploaded, you must cut out each pinwheel – red, white, and blue. The unassembled paper will look like this:

- Next, you have to bring the holes together along the outside edge towards the center of the hole.
- Then, you need to thread a brad through all five holes and open it so the entire pinwheel holds together.
- Get the glue and stick the wooden dowel on the back to complete the pinwheel. Continue the same steps for other pinwheel cuts.
 2. Statue of Liberty Crown
Are you excited to take on the next project, and do you need more of Cricut 4th of July ideas? Making a Statue of Liberty Crown for this year’s Independence Day is easy. Let us see how to do it:
- First, upload a sketch of the Statue of Liberty to your Design Space. Or you can find a relevant design from the Design Space access. The design should have one portion for the Crown and another for two headbands.
- Next, the Cricut machine should be set to the Cardstock settings. Now, place your paper on top of the cutting mat. Then, follow the prompts in the software to load the paper and give instructions to cut.
- Once the machine cuts the paper, you need to take the paper off the mat. It is good to use tweezers to remove the cut portion.

- After removing the cut pieces, you must attach the Crown and the headbands together.

- Hola! You have your own Statue of Liberty Crown for your child to wear during the Independence Day celebration.
Customizing your t-shirt by using a Cricut machine is always fun. So, why not customize your t-shirt that shows your patriotism?
- You need a Blank t-shirt, America Cut file, Cricut machine, Iron-On Vinyl, EasyPress 2, EasyPress Mat, Iron-On Protective Sheet, and Weeding Tools.
- First, you need to upload an American Cut Rainbow design, or you can search for the same on Design Space images. And mirror the image before you give instructions to cut. There will be an option Mirror, that reverses the image.

- Next, you need to place the Vinyl face-down on the mat before loading it into the machine.
- Now, change the material settings to Vinyl and click go. Let the Cricut cut the Vinyl.
- After the cutting, you need to remove the excess Vinyl and keep just the image.
- The next step is to plug the EasyPress 2 into the power. Be sure that the settings on the press machine are in the recommended settings of the Vinyl. After the EasyPress is heated up, place your shirt on the EasyPress Mat and, for 5-10s, preheat the area.
- Then press it on top of the Vinyl and press the Cricut button, i.e., C. You need to hold it firmly without moving as the countdown begins. And next, turn the shirt over and press it again using EasyPress again for 15s.
- After pressing the design on the t-shirt, you must remove the carrier sheet before the Vinyl cools down.
- Now, let it cool down, and you will have the America Rainbow printed on your t-shirt.
 Conclusion
As Independence Day 23 is getting close, the entire country is ready to celebrate it. As a crafter, you are looking for ideas to celebrate uniquely. So, here are the Cricut 4th of July ideas for you to make creative designs to show your patriotism. These designs, Pinwheels, Statue of Liberty Crown, and America Rainbow, will provide you with enough energy to make more crafts for your Independence Day.
Visit Site – Cricut.com/setup
Cricut Design Space Login
Cricut Setup
Cricut.com setup windows
Cricut.com setup mac
Cricut maker setup
Source :- https://cricutmachinedesign.space/top-3-cricut-4th-of-july-ideas-inspiring-festive-diy-crafts/
Celebrating Independence Day with some of the best Cricut Fourth of July ideas lets the citizens live those moments and make them unforgettable for the rest of the year. However, it’s that time of the year when friends and family gather together and enjoy quality time by cooking different cuisines under the sky covered with fireworks.
You need to brace yourself if you are looking forward to making the coming day of the year much better than last year. Not only children but adults actively participate in creating personalized big or small projects. In this post, you’ll get introduced to some of the easiest and classy do-it-yourself crafts.
1. Cake TopperThe feeling of Fourth of July doesn’t get complete without having red, white and blue color cake toppers on the dessert. Baking a cake or an apple pie to honor the country’s Independence is one of the special feelings.
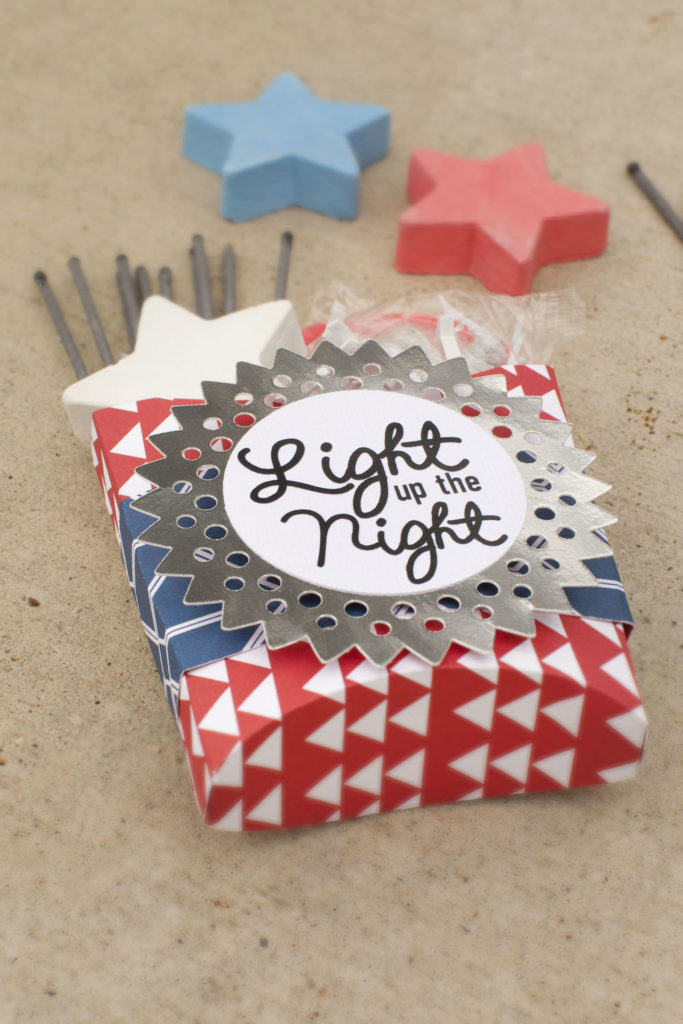
 2. Glitter Fireworks
Furthermore, the glitter fireworks are on the Cricut Fourth of July ideas checklist. Lightning up the fireworks makes the night look more wonderful and gives hair-raising vibes till it ends. Apart from that, people try to be creative by creating something cool, making them look classy.
 3. Customized T-Shirt
Designing customized T-Shirts can play two roles, i.e., being a patriotic & party lover. If you prefer being in your comfort zone, creating a loose puny tee with an inspirational yet trendy quote can be the best option. However, you can easily do this project using Maker Machine & Easy-Press.
 4. Decorative Wooden Sign
If you are loyal to your country and respect all their decisions, crafting the wooden sign will be an easy alternative to display emotions. On the contrary, you can create this project from a smart cutting machine. Following this, you can place them into your entry gate or backyard.
 5. Patriotic Pinwheels
In addition, the patriotic pinwheels are one of the best Cricut Fourth of July ideas that can be put down into any place, making it one of the special decorative items or party favors. Apart from that, it completely depends upon the user which material they’ll choose to create the pinwheels.
 6. Patriotic Planter
On the other hand, if you are a plant lover and faithful towards your country, you must be painting all the pots saluting the veterans who sacrificed their lives for the country. After painting all the planters, your lawn/backyard must indicate a special message that is making you teary.
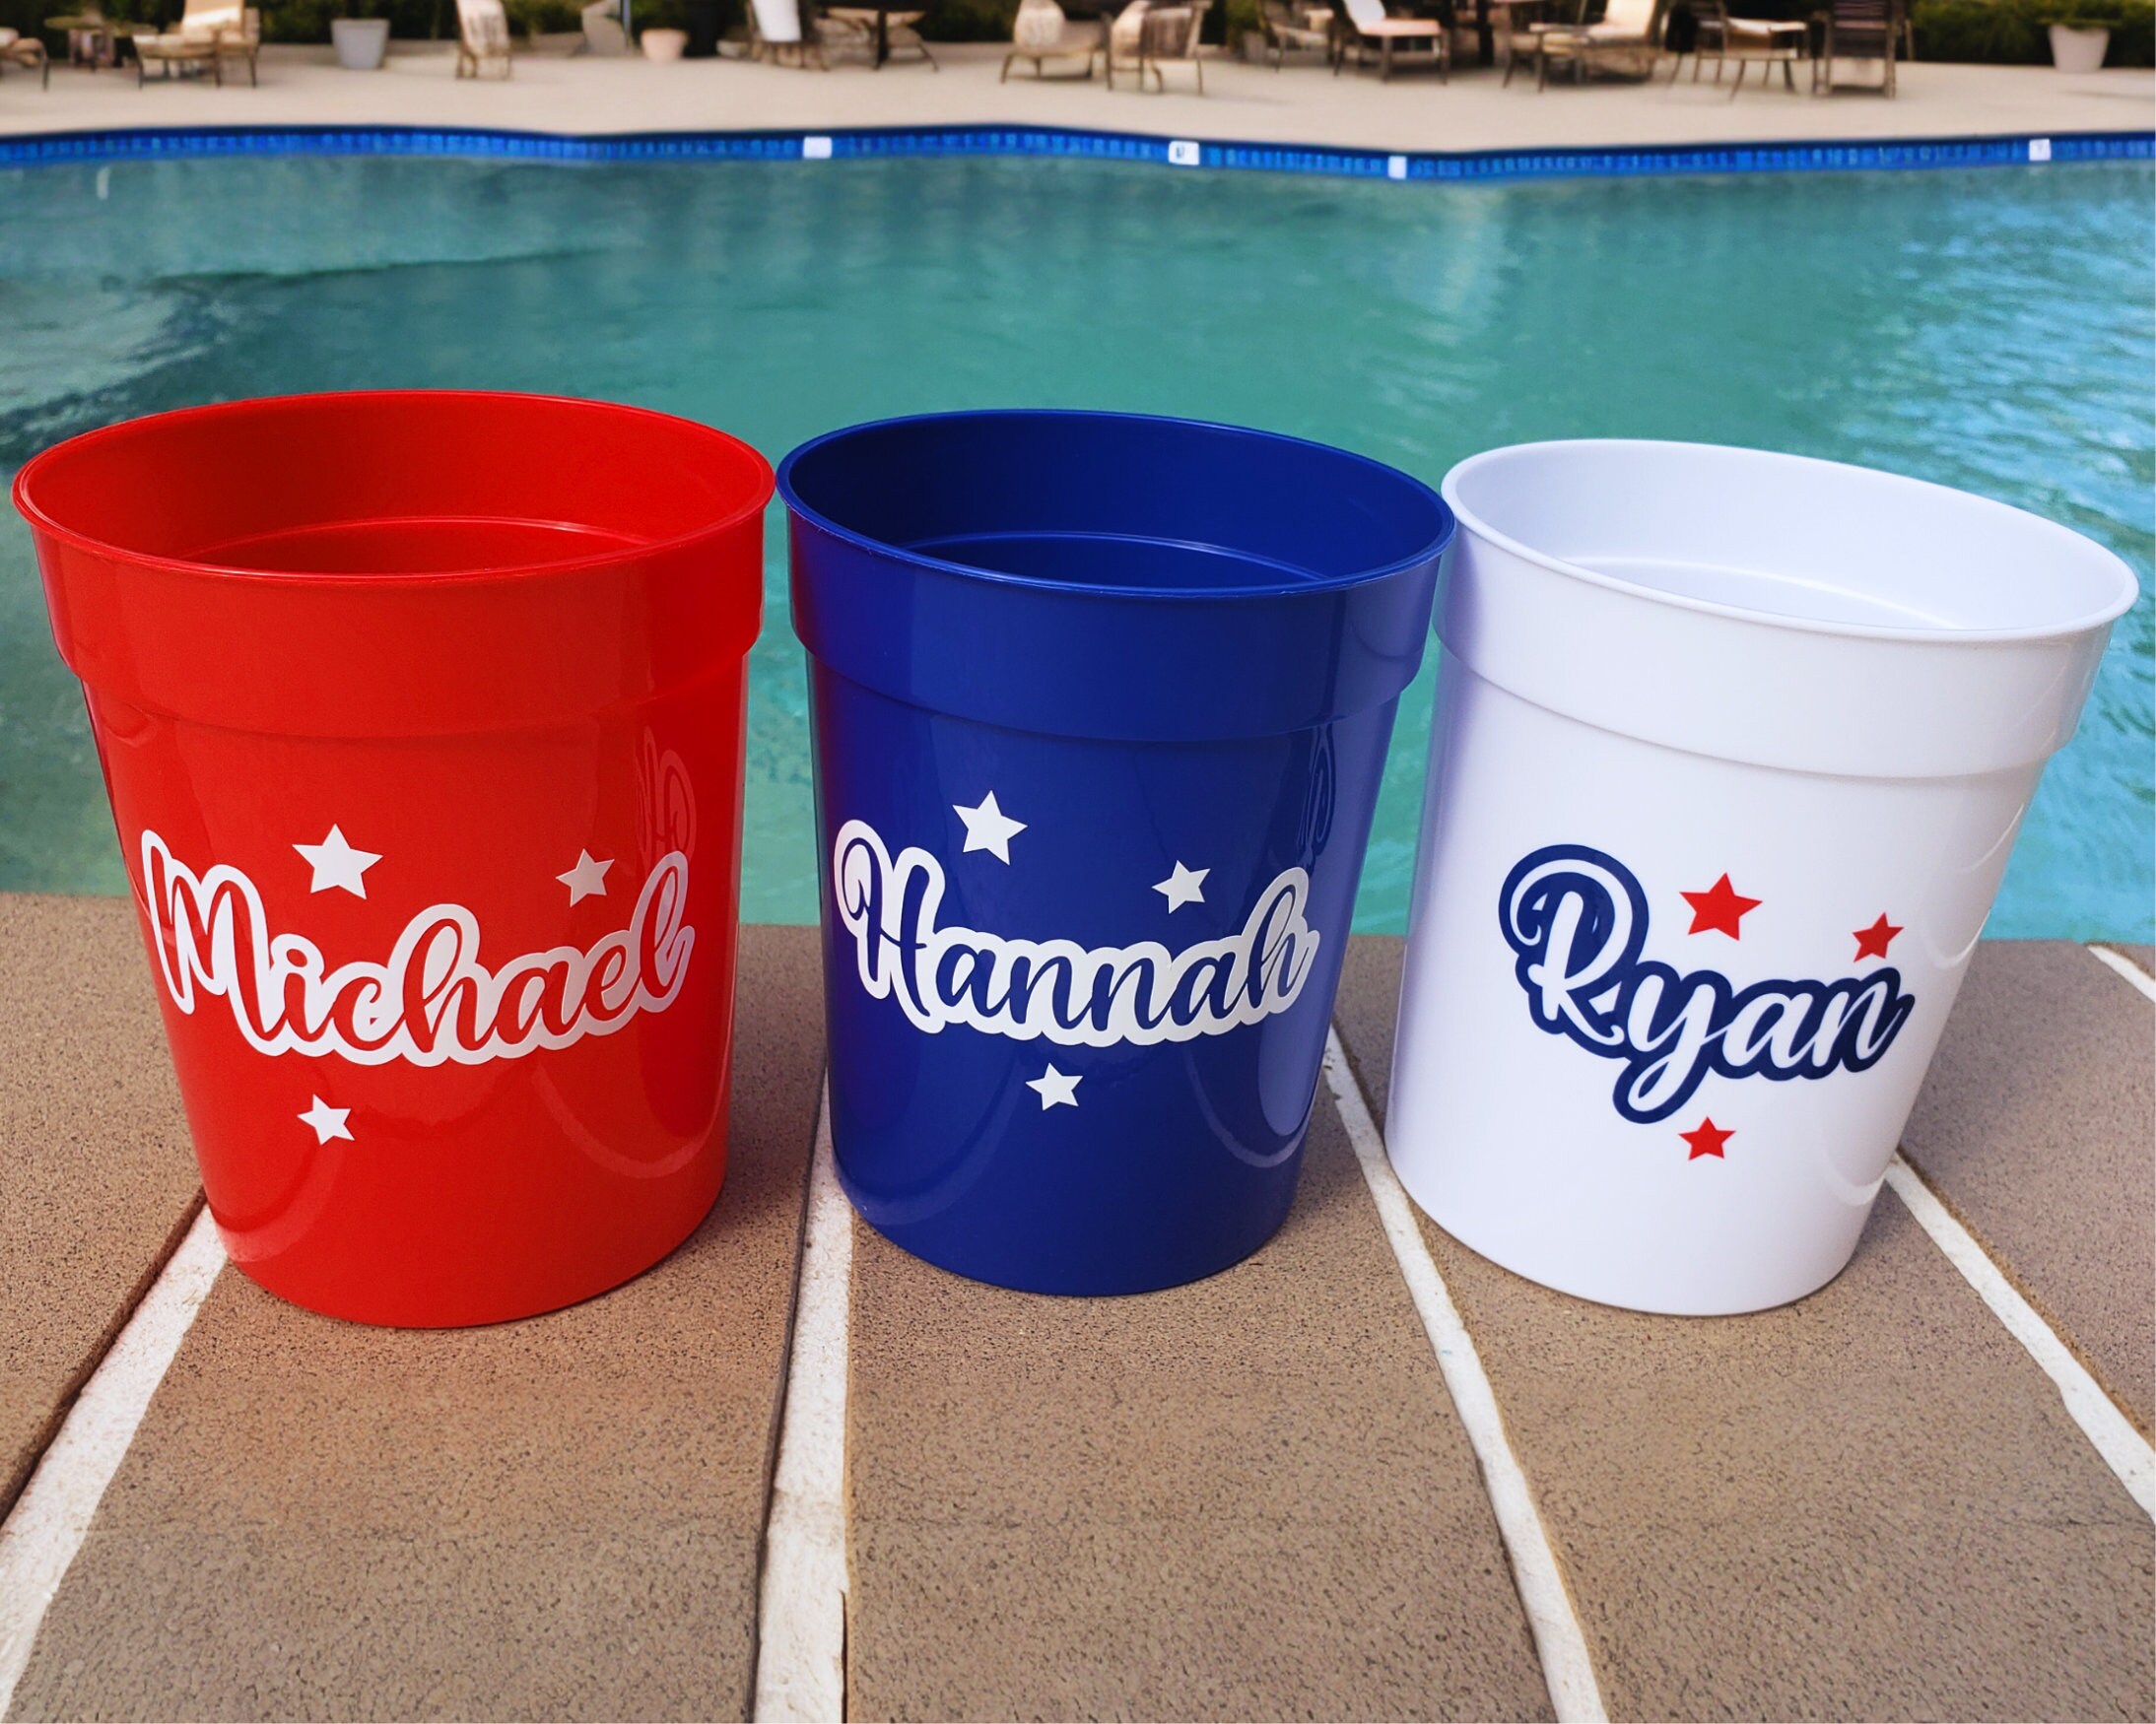
 7. Personalized Celebration Buckets
Moreover, personalized celebration buckets are another Cricut Fourth of July idea that can save the item from getting lost while being a part of the crowd. In addition, it helps the parents in locating their children with the design made on the bucket.
 8. Independence Day Tic Tac Toe
With the Tic Tac Toe game, the user will be a part of the physical activity and help them increase their mind quality. It’ll not only excite the children to come out of their cellphones but also use their minds to win the round.
 9. Patriotic Door Hanger
Hanging the door hanger signifying your excitement towards the day, can envy your neighbors. However, choosing the hanger’s size, shape and color combination completely depends upon the DIYers. Moreover, they can also select the machine they want to use while creating the personalized hanger.
 10. Tote Bags
For all those office-going people who love their country, purchase the personalized tote bag showing the date, month, name or other details on it. Apart from that, one can carry their tote bags at the office or other events while travelling.
 Conclusion
As a conclusion with this post, we hope that you were able to grab some of the simple yet classy Cricut Fourth of July ideas. Apart from that, it can be expected that the crafter will choose the project as per their capability without wasting any material. Moreover, they must collect the correct number of supplies and the cutting plotter. We’ve shared some of the commonly asked FAQs in the section below for your convenience.
Frequently Asked QuestionsQuestion: What Are the Items Needed to Create the Cricut Projects?Answer: Intending to get the best-customized project, all the users need to have some of the basic supplies along with them. Moreover, it can be expected from all the users to keep all their respective items safe. The list includes:
- Cricut smart cutting machine (any machine).
- Design Space account.
- Basic Tool Set.
- Blade & Housing Set.
- Basic Essential Kit.
- Power Cord/USB cable.
- Welcome Book.
- Materials for a test cut.
Answer: Some of the important tips that every crafter is supposed to follow while creating Cricut Fourth of July ideas are as follows:
- Ensure that you’ve chosen the correct machine & material using which to create the project.
- Don’t forget to create your account on the Design Space software.
- Moreover, you’ve to ensure the materials have been loaded correctly inside the machine without any bubbliness.
- Be careful while cutting down the project with the tools available inside the Basic Essential Kit.
Answer: It’s completely worth starting a business using a Cricut machine. With Cricut, an individual can create unlimited customized projects covering personal and professional reasons. However, you can start it as part-time or full-time work by taking orders for various crafts and preparing them per the customer’s requirements.
Visit Site – cricut.com/setup
Cricut Design Space Setup
cricut explore air 2
cricut machine setup Mac,PC
cricut.com setup windows
cricut.com setup mac
Source :- https://cricutdesignspace-setup.com/10-best-cricut-4th-of-july-ideas-for-a-festive-celebration/
Yes, you can cut felt with your Silhouette Cameo. But before learning the process, let me tell you some things. This process will mess up your mat faster than normal cutting. You may get many tutorials on how to cut felt with Silhouette Cameo. You will have to use the Cameo 4 rotatory blade for this. Also, a standard tack cutting mat for cutting the basics felt with Cameo. And for the thick felt, you will need a strong stack cutting mat.
Today I’m sharing a beautiful DIY felt flower valentine project for you. In this blog, we will learn to apply adhesive vinyl on cardstock to prepare a valentine’s card to pair with a pin. The cards we will make are perfect for giving to teachers, elders, or any loved one or kids. Let’s see the step-by-step tutorial and try to make a project on your own.
What Supplies Do You Need To Prepare A Valentine’s Card?These are the supplies you will need:
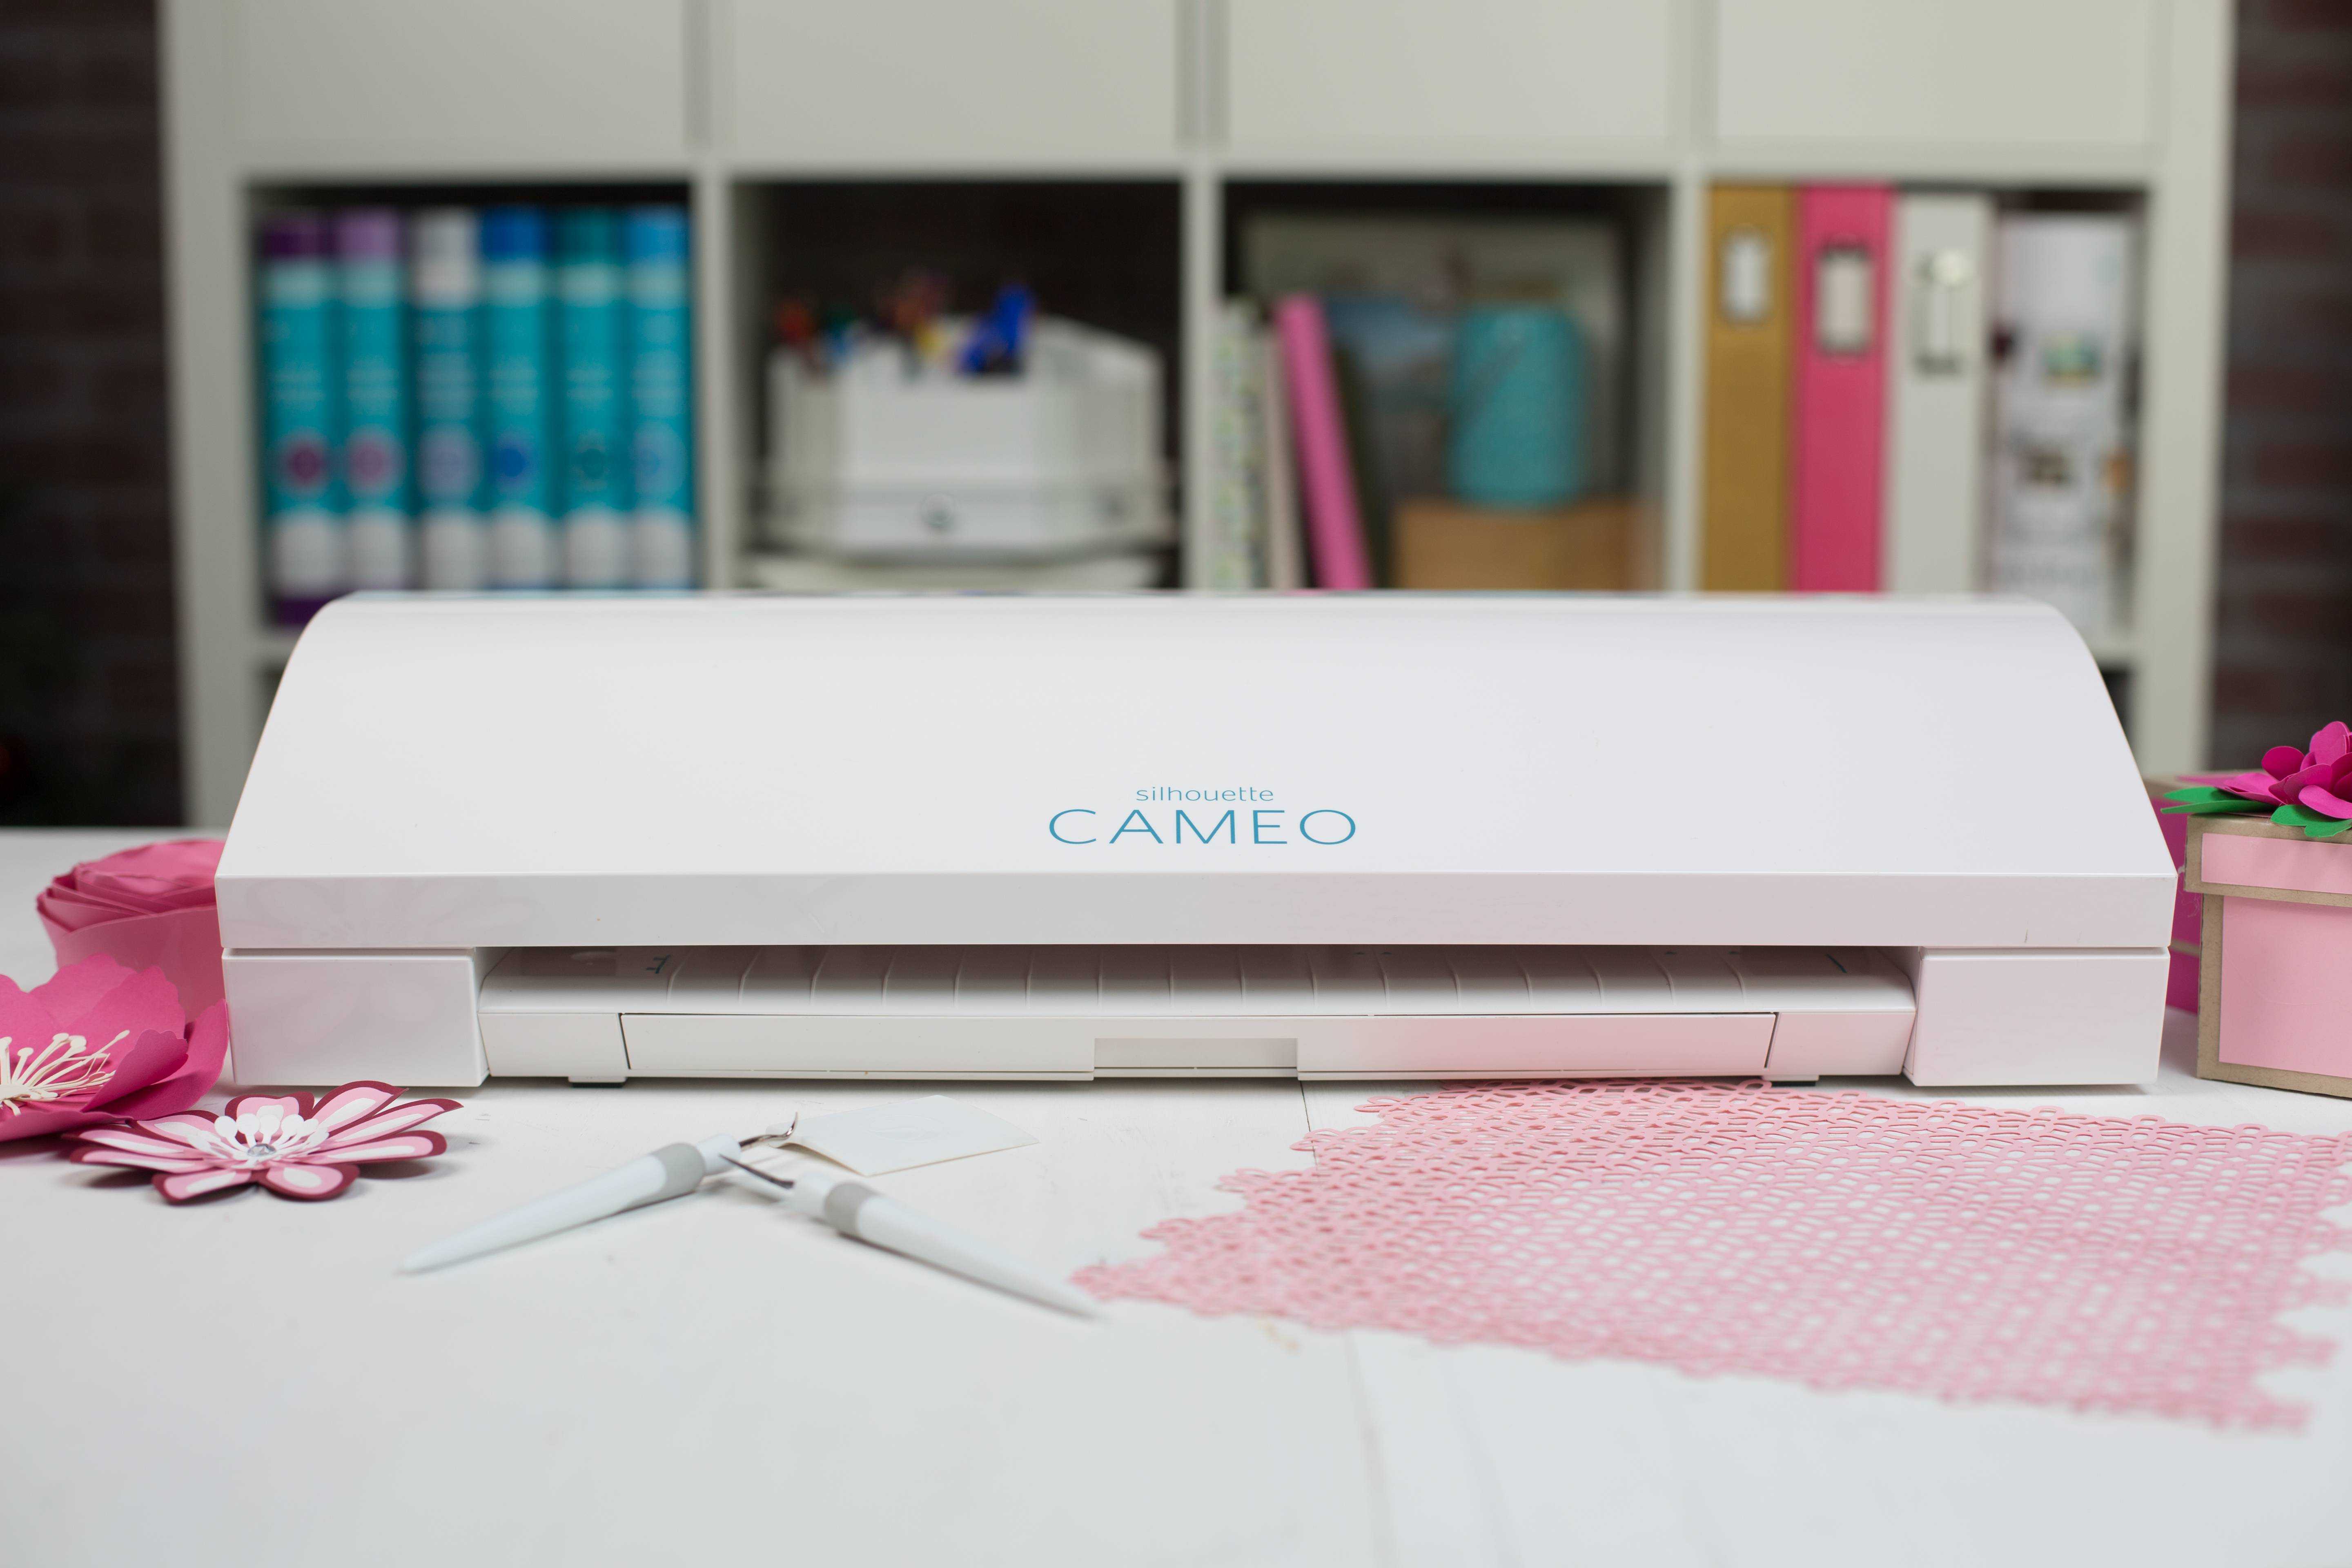
- Silhouette Cameo 3 machine /Any crafting machine
- Cutting mat
- Silhouette sketch pen
- Weeding hook
- Deep cut blade
- Flower cut lines
- Glue gun
- Cardstock
- Adhesive vinyl
- Transfer tape
- Tie tack/ pins
- Wool blend felt
Felt is a non-woven fabric prepared from polyester, typically from recycled polyester fiber. Users use felt due to its ease of use, and it can be easily cut, stitched, glued, and sewn; the fibers stay compiled, and the edges don’t twist. Plus, the felt can be decorated with beads, sequins, or some other embellishments. Felts are very popular for embroidery too. So, now that you know a bit about felt let’s see how you can cut it.
How To Cut Felt With Silhouette Cameo To Make A DIY Flower Valentine?There are a few steps you must follow to cut felt with Silhouette Cameo.
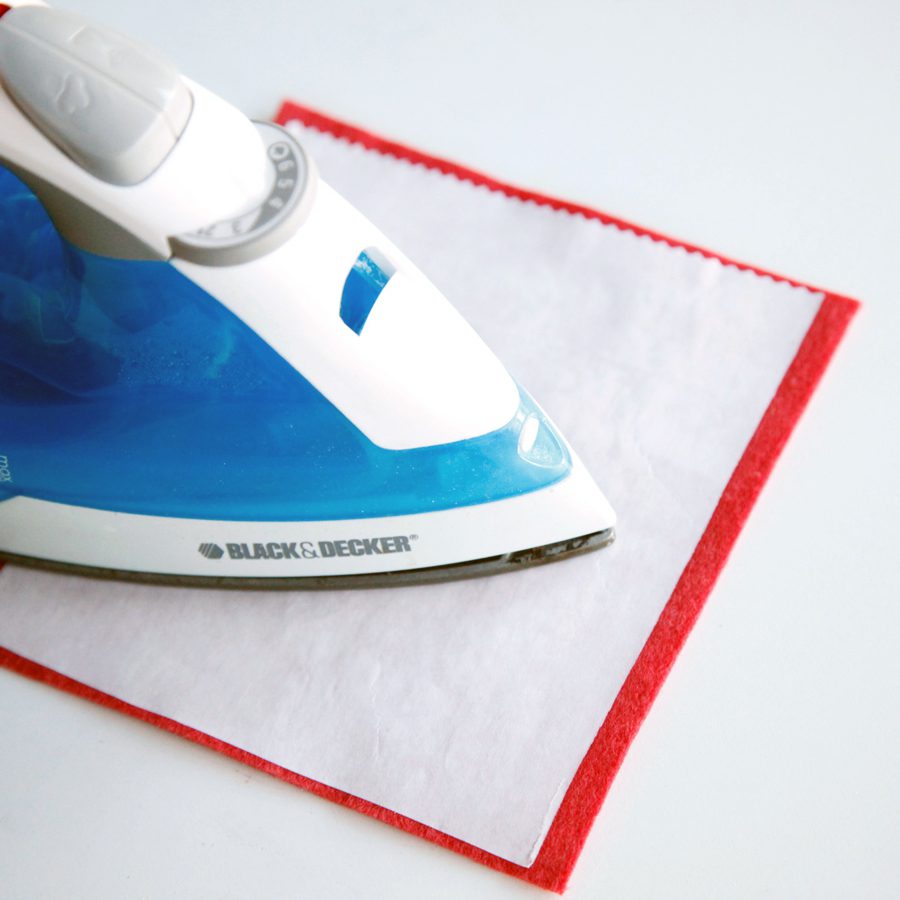
Step 1Start with cutting heat N’ bond slightly smaller than the felt. Now, apply the Heat N’ bond to the felt, following all the instructions on the package. The Heat N’ bond lets the felt stick firmly on the mat to prevent it from shifting or sliding while cutting. You must note that the felt doesn’t cut with the fabric, ratchet, or premium blade.
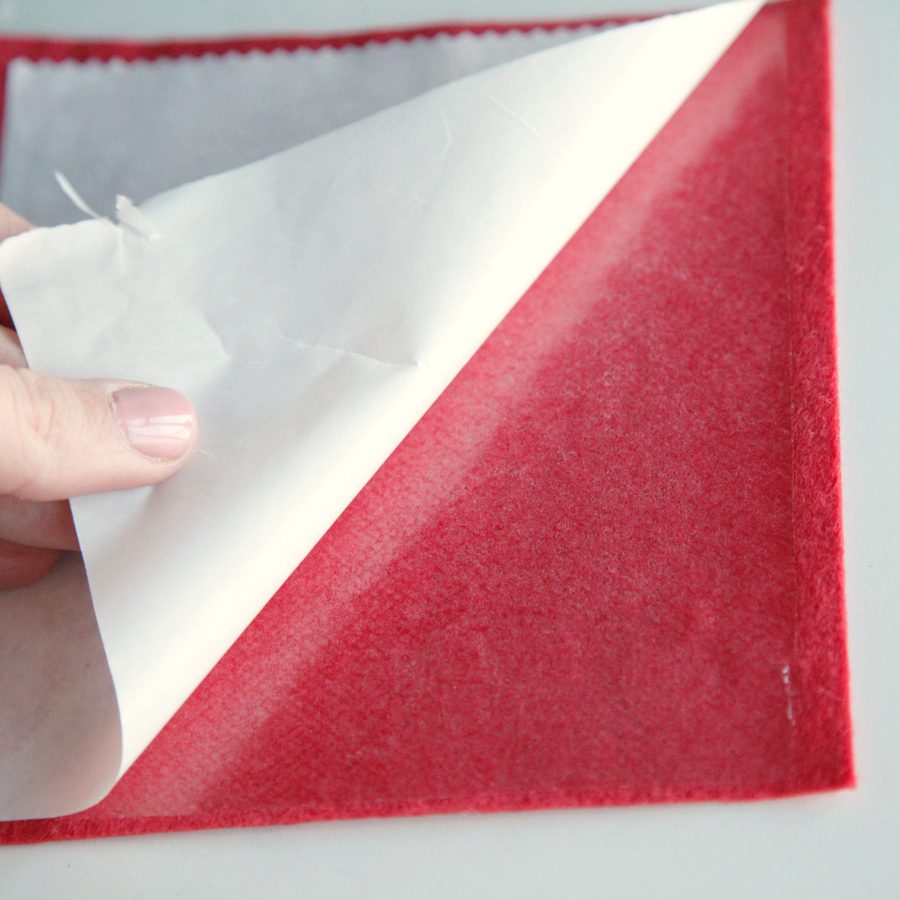
 Step 2
Peel off the backing from the Heat N’ bond. After that, attach the felt to the cutting mat with the Heat N’ bond side down.
 Step 3
Now, open the flower cut file in Silhouette Studio and adjust its size as you like. We sized the flower to about 4.5 inches.
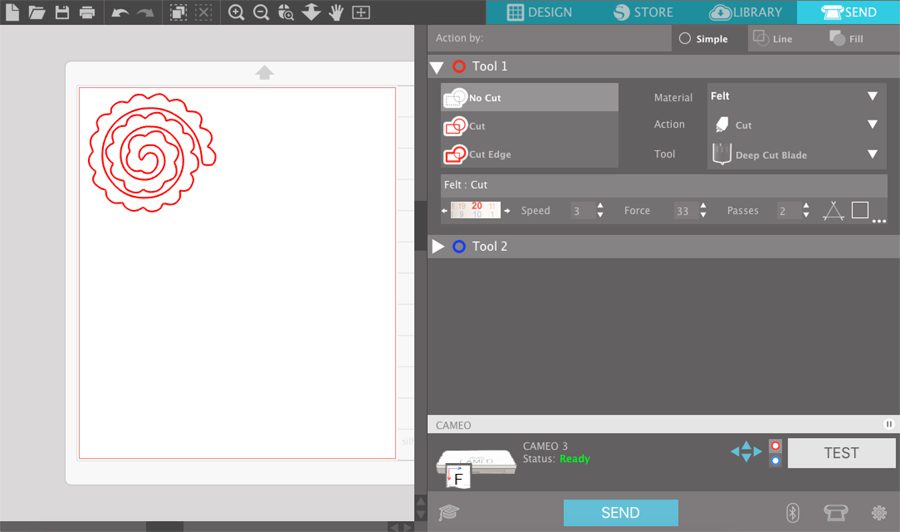 Step 4
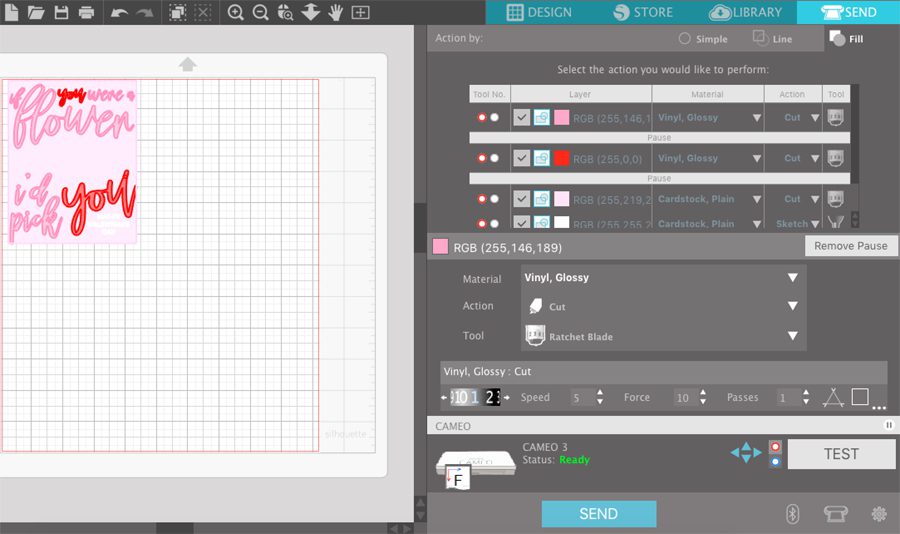
Make changes to the settings as follows:
Blade- 20
Force- 33
Passes- 2
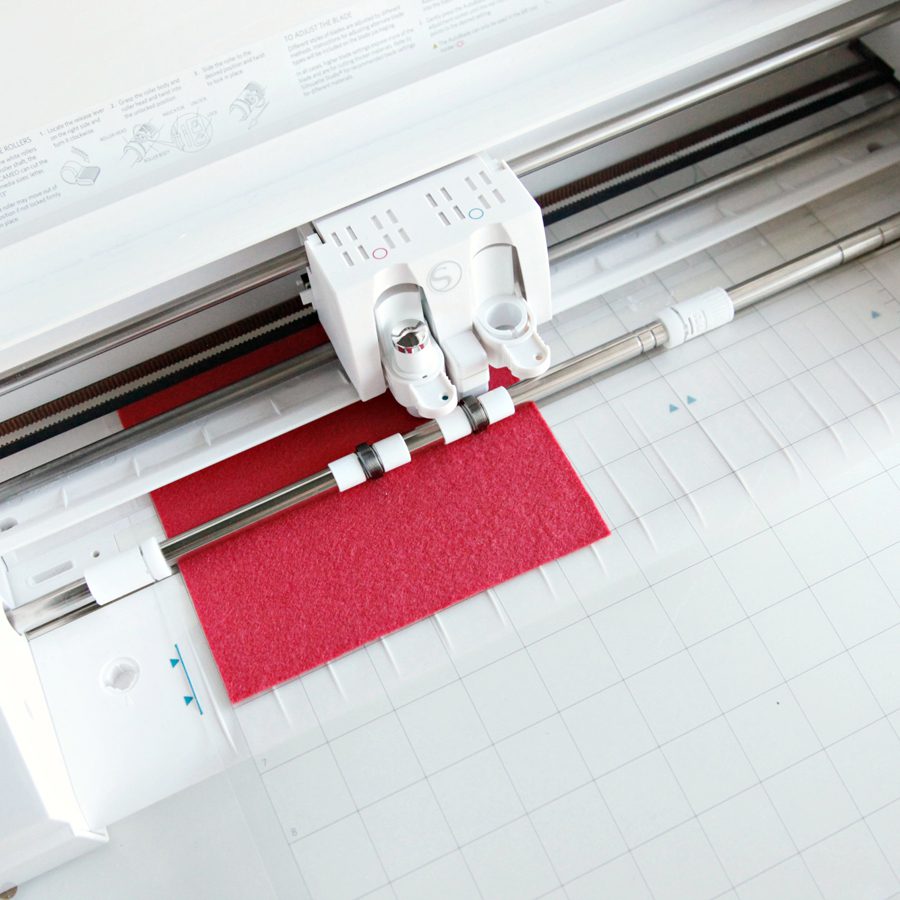
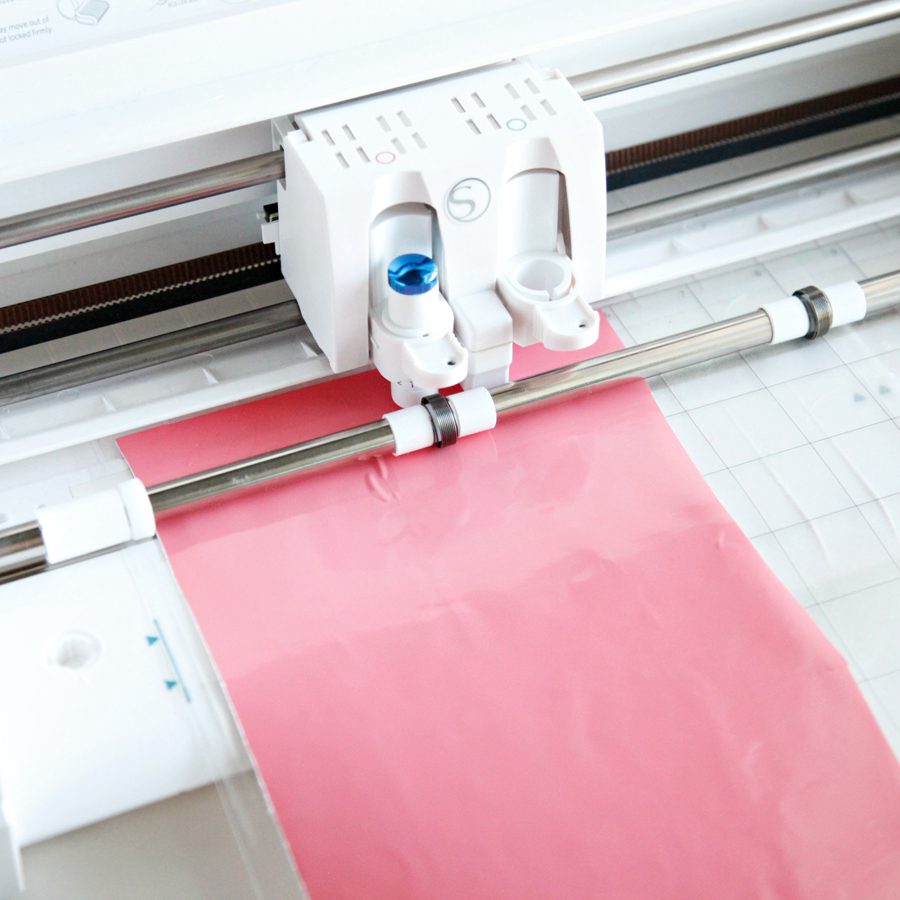
After that, put the felt on your cutting mat and then load the mat into your Silhouette machine and send the cut file.
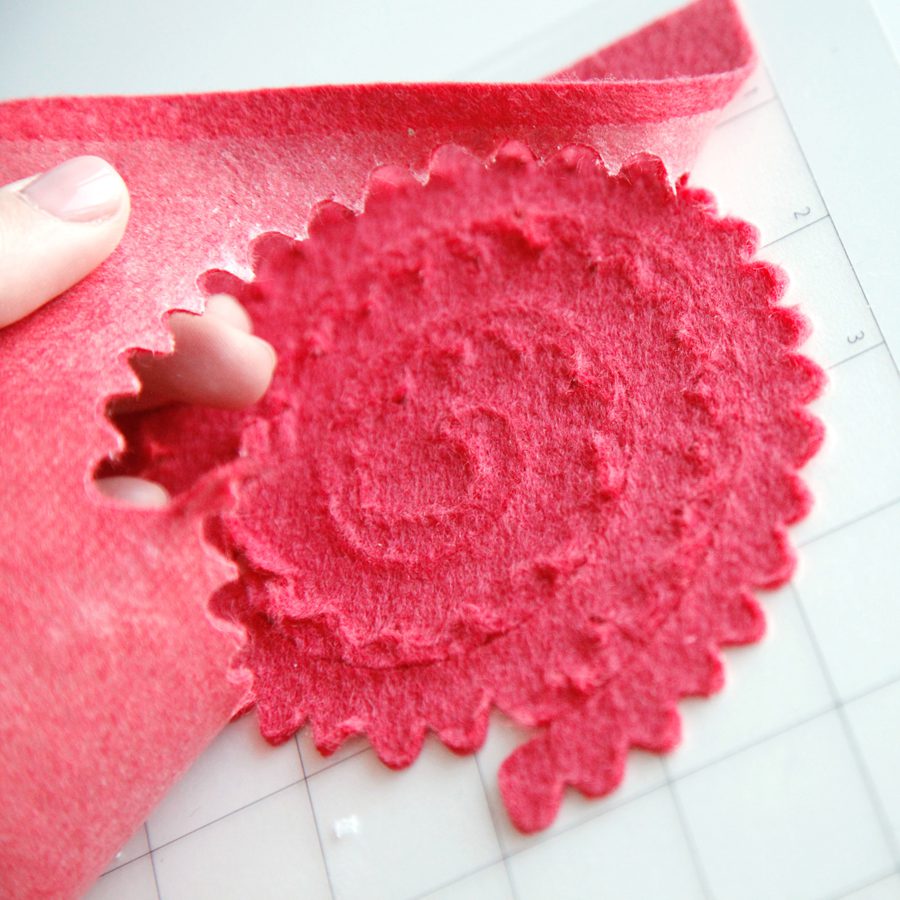
Step 5Take off the felt from the mat.
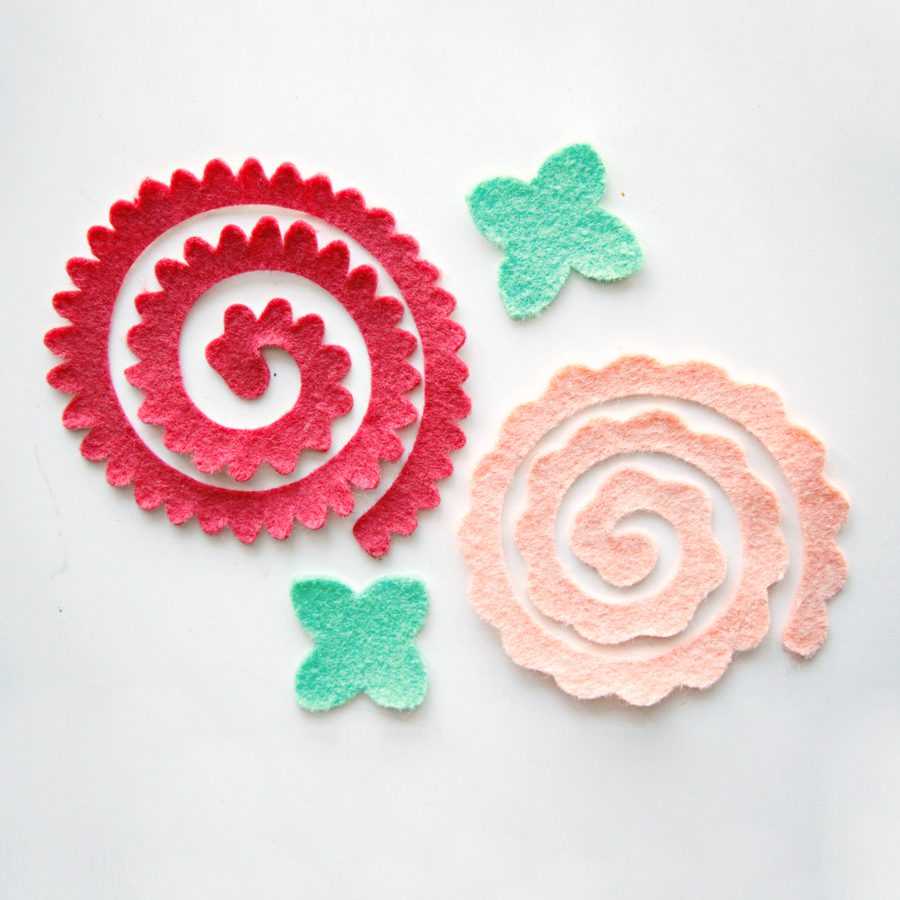
 Step 6
Do the same process of felt cutting with the leaves. You can download a Studio or SVG file. You can also cut them by hand.
 Step 7
Now, roll your flower front end on the outside of the spiral. If you are unable to hold and roll the flower, add glue with each step you roll.
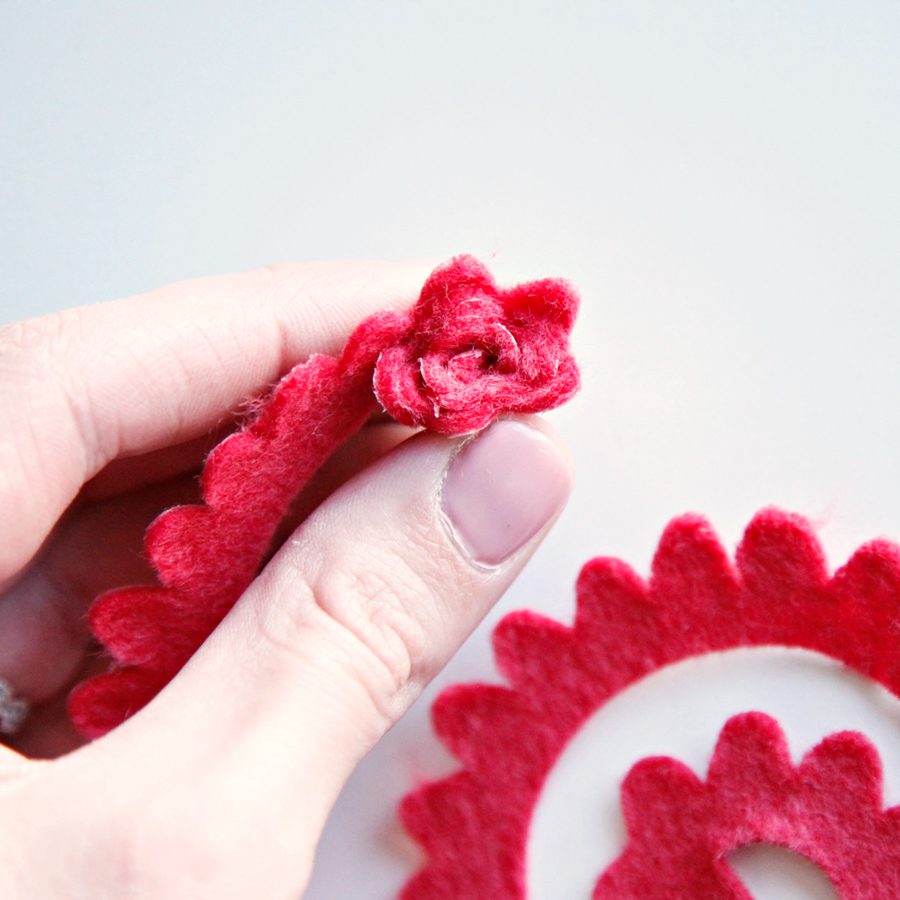 Step 8
When you reach the end of the spiral, apply some hot glue to the bottom of the flower, fold the remaining felt on the glue to finish the rolling and hold it together.
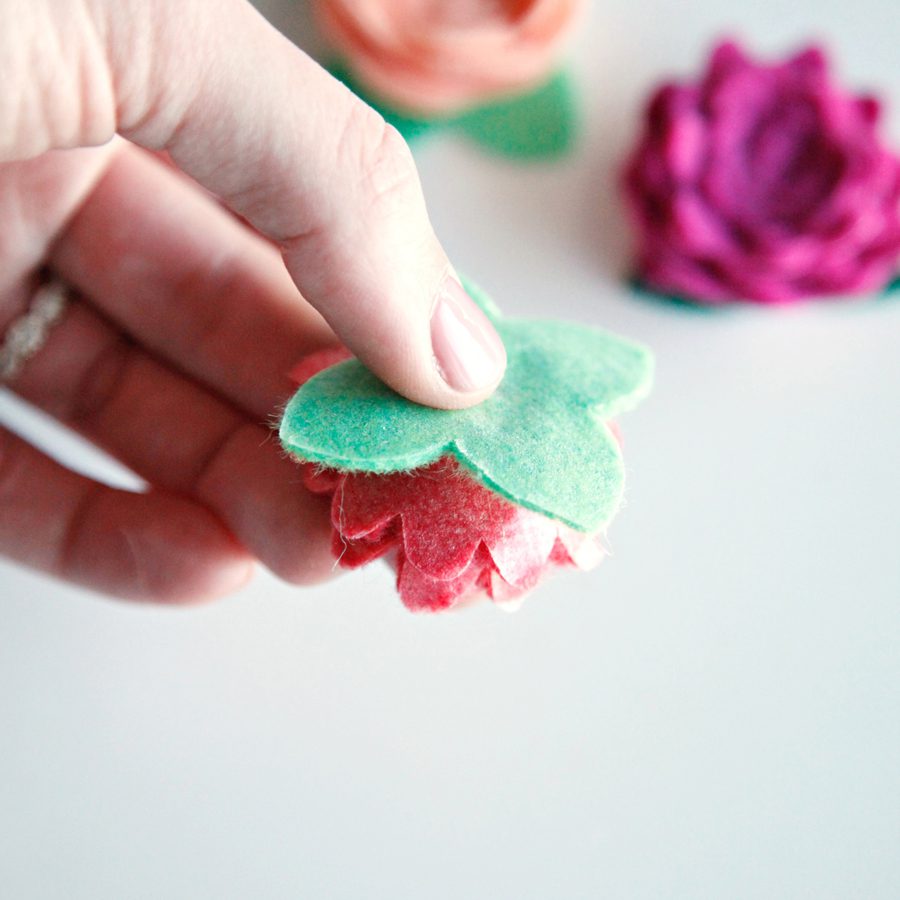
Then, apply another drop of hot glue to the bottom of the flower and attach the leaves. Now, add one more drop of hot glue on the bottom of the leaves and then attach the pin.
 Step 10
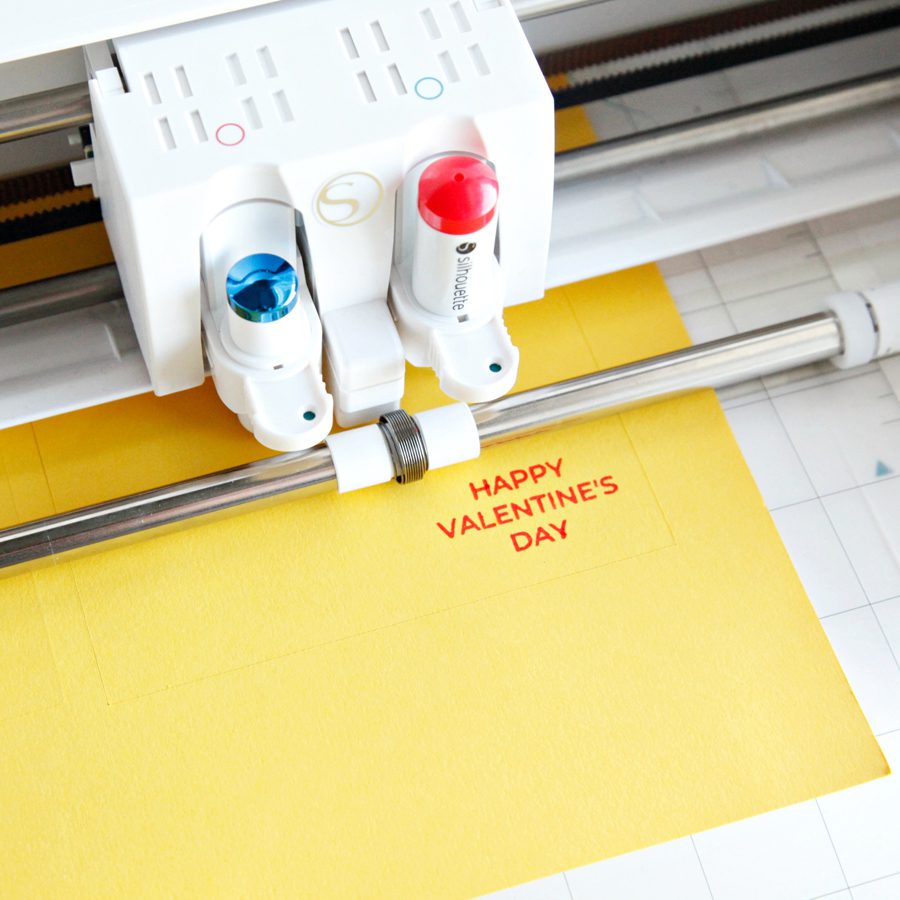
Once your flower is prepared, you can make your card. You can make a card just by printing it. But if your printer is out of ink, you can use your Silhouette Cameo for this.
 Step 11
Load the adhesive vinyl and mat into the machine. Then, start cutting your adhesive vinyl and follow the instructions to switch materials.
 Step 12
When instructed, switch the material to the cardstock, add a sketch pen to the machine, and click Resume.
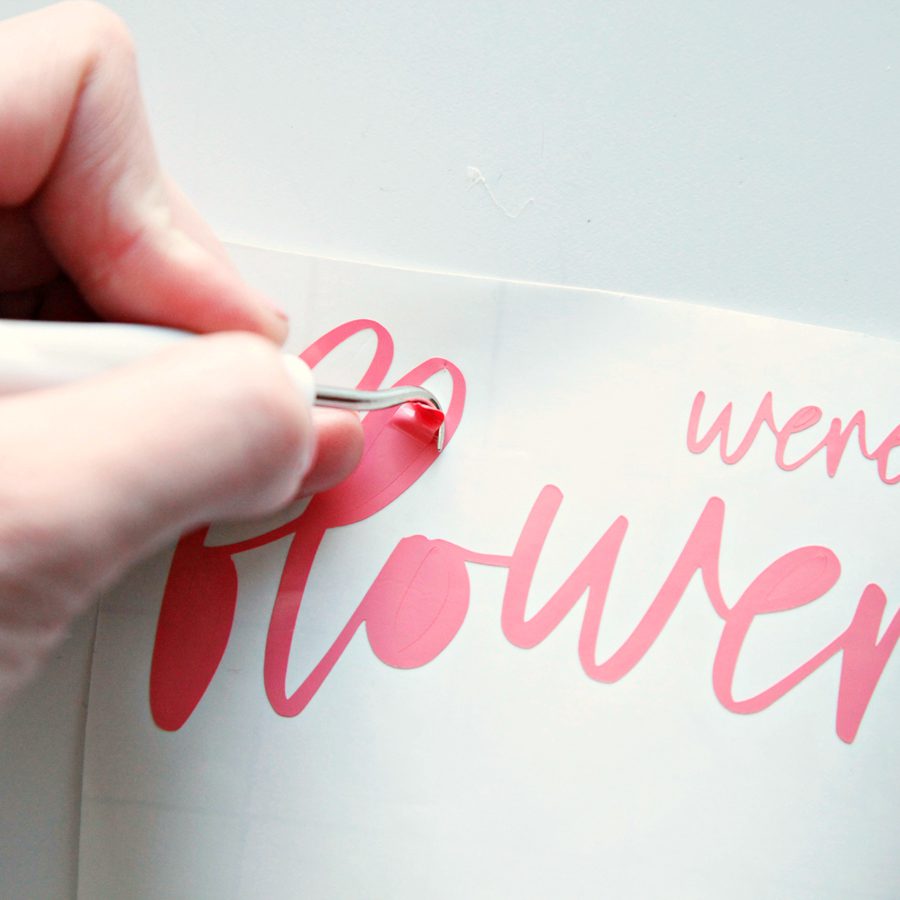
 Step 13
Weed out the excess vinyl with your weeding tool.
 Step 14
Now, use the transfer tape to shift the vinyl from the carrier sheet to cardstock.
 Step 15
Then you can put your card and flower together. Attach your flower in the middle of the card for a nicer look. Now that you have learned how to cut felt with Silhouette Cameo try something on your own.
 FAQsWhich Blade To Use To Cut Felt With Your Silhouette Cameo?
It is not very easy to cut felt with the Silhouette Cameo by using the Cameo 4 rotary blade. And also, you don’t have to use the stabilizer. The rotary blades roll across the felt and don’t drag the blade through it, which allows the felt to cut very easily.
Which Is The Best Tool For Cutting Felt?You will need sharp scissors, a printer, an iron, and freezer paper.
Is It Easy Or Tough To Cut Felt?With Silhouette Cameo, it is quite easy to cut felt, as it doesn’t fray during the process. You just need to master the correct technique to work with.
Visit Site – silhouette cameo
silhouette cameo 4
Silhouette Cameo 4 Pro
Silhouette Setup
silhouette cameo software
silhouette.com/software
Source :- https://cameosilhouettecameos.com/how-to-cut-felt-with-silhouette-cameo-step-by-step-guide/
One of the most googled questions searched by every crafter is what is a Silhouette Cameo 3. It’s transparent that the manufacturer has launched different series, each with different specifications. With the help of its blades, this machine can cut at least 100 materials up to 12 inches wide and 10 feet long. Along with the cutting plotter, you’ll get Silhouette Studio, a design software considered while creating various projects.
In addition, it comes with Bluetooth technology, via which you can share the file without a USB cable. Moreover, it can cut printed materials and is compatible with PixScan. Let’s begin by introducing you to the basics of this electric cutting machine without consuming any time.
What are Silhouette Cameo 3 Features?Silhouette Cameo 3 was introduced in Aug 2016, with some of the top-most features having updated features, making it worthy among the consumers. Look at some of the prominent characteristics of this smart cutting machine in the section below.
Adjustable RollersBy rearranging the rollers available on the main roller shaft, the machine can cut into the following sizes: A4, letter, 12″ & 13″. The provided spring rollers have been designed as a pleasant way to hold the uploaded materials in place. These rollers help the users customize the project depending on the material type.
 Barcode Scanning
The second Cameo 3 feature is that it can read barcodes designed in the Registrations Marks panel of the Silhouette software. One can use this feature by printing a barcode and registration marks onto the Print & Cut pages. The optic scanner will scan the code and will start its process.
 Bluetooth
In addition, this model is compatible with Bluetooth technology, allowing the users wireless communication. To take advantage of this feature, one must install the Bluetooth adapter, which can be found at the bottom of the machine compartment.
 Crosscutters
If you have got a large piece of material, the cross-cutter will be very helpful. This paper cutter is available on the machine’s back, which lets you finish the cut job in one quick stroke. In addition, this track directly gets attached to the Cameo 3 back, giving users a straight edge every time.
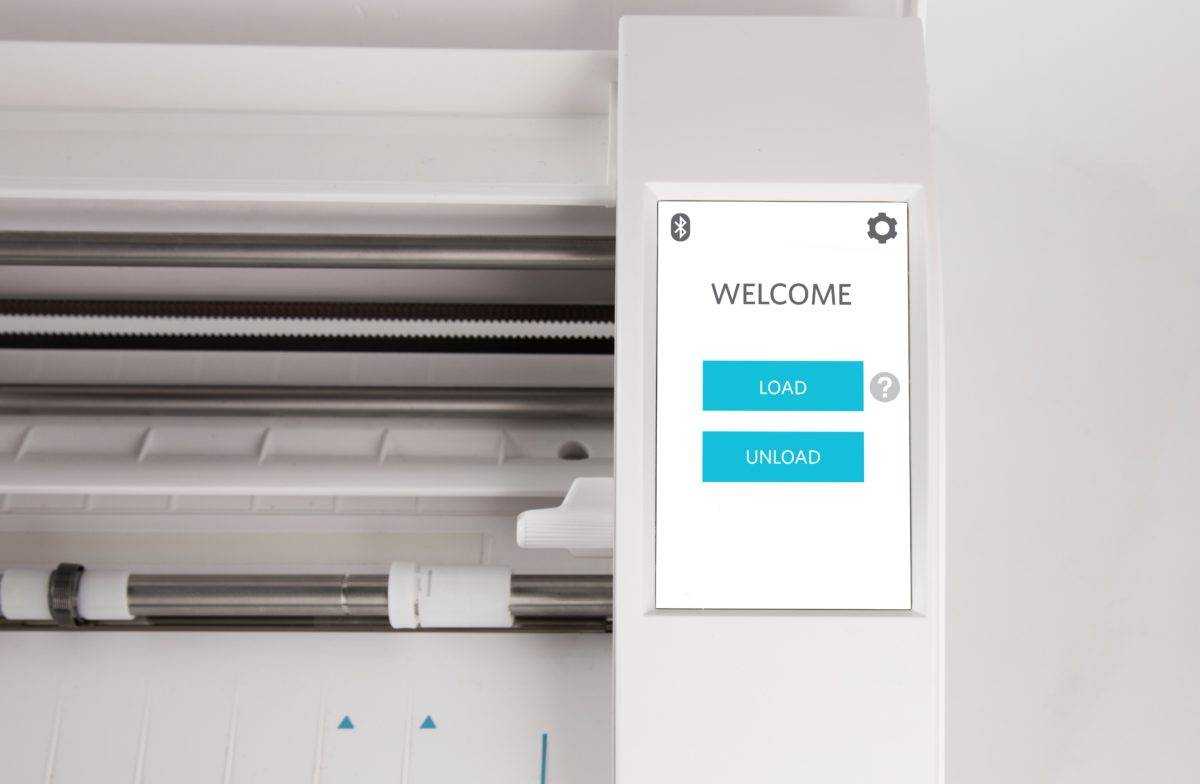
 Full-color LCD Touch Screen
With the assistance of the touchscreen feature, one can smoothly upload media files and operate the machine settings. Moreover, it also comes with a sounding feature that assists in sailing across the screens. Further, Cameo 3 also offers small lessons guiding the users to the basics of the machine.
 Ink Stippling
Following this, Ink stippling is a process by which the design is created with a series of dots. Through this process, one can turn any design from the Design Store or any image into a stipple design.
Besides collecting info about this machine version, let’s take a step forward by providing a guide on the total number of supplies inside the box.
What are the Supplies Provided With Cricut Machine?Equally important for all the users is to get a complete list of supplies depending upon which the Silhouette will be eligible while crafting out the customized project:
- Cameo 3 electronic cutting machine.
- Silhouette Studio Software.
- Power cable & USB cable.
- 12×12 inch cutting mat.
- AutoBlade-Slhoutte’s updated adjusting blade.
- Design Store 1-month basic subscription plan.
- Vinyl Crosscutter.
- 100+ digital designs & blade adjustment tools.

Further learning about the basic supplies, keep scrolling down the blog to learn about the various projects that can be crafted from this plotter.
What are the Projects That Can Be Created With Cameo 3?In addition, after learning about some of the crucial supplies, let’s take a step by coming across the various projects that can be designed with this cut-die machine. However, to know about those projects, look at the pointers shared below.
Vinyl Projects- Baking Container Labels.
- Floral Faux Wallpaper.
- Chalkboard Globe.
- Shadow Box Photo Frame.
- Reindeer Head Holiday Banner.
- DIY Wedding Invitations.
- Zipper Cards.
- Paper Succulent Wall Art.
- Woodland Bookmarks.
- 3D Paper Houses.
- Nautical Pillows.
- Baby Cloth Shoes.
- Burp Cloth.
- No Sew Applique T-Shirt Design.
Answer: Follow these steps to learn about the registration process for Cameo 3 machine:
- Open the machine official website.
- Search for the Product Registration option.
- Press the Create Account and submit the basic details.
- You’ll be provided with Silhouette ID & Password.
- Use them to sign into the account and start registering for the machine.
- Submit the required details and press the Register Machine option (if available).
- Your Cameo 3 message registered successfully will be shared on screen.
Answer: The Cameo 3 blades last up to 06 months. Its durability depends on the type of material it has cut down, how many times it has been used and its quality. However, if you try to cut down thicker materials with a less sharp blade, the blade will automatically decrease its sharpness.
Question: Why is My Cameo 3 Making Unusual Noises?Answer: The sounds made by Cameo 3 are considered normal by everyone. However, suppose you are observing unusual noises while making crafts from the Cameo 3. In that case, it might happen if the packaging tape that was used to cover up the machine motor that was supposed to keep it safe wasn’t attached properly.
Visit Site – silhouette cameo
silhouette cameo 4
Silhouette Cameo 4 Pro
Silhouette Setup
silhouette cameo software
silhouette.com/software
Source :- https://silhouettecameo-pro.com/what-is-a-silhouette-cameo-3-features-supplies-available/
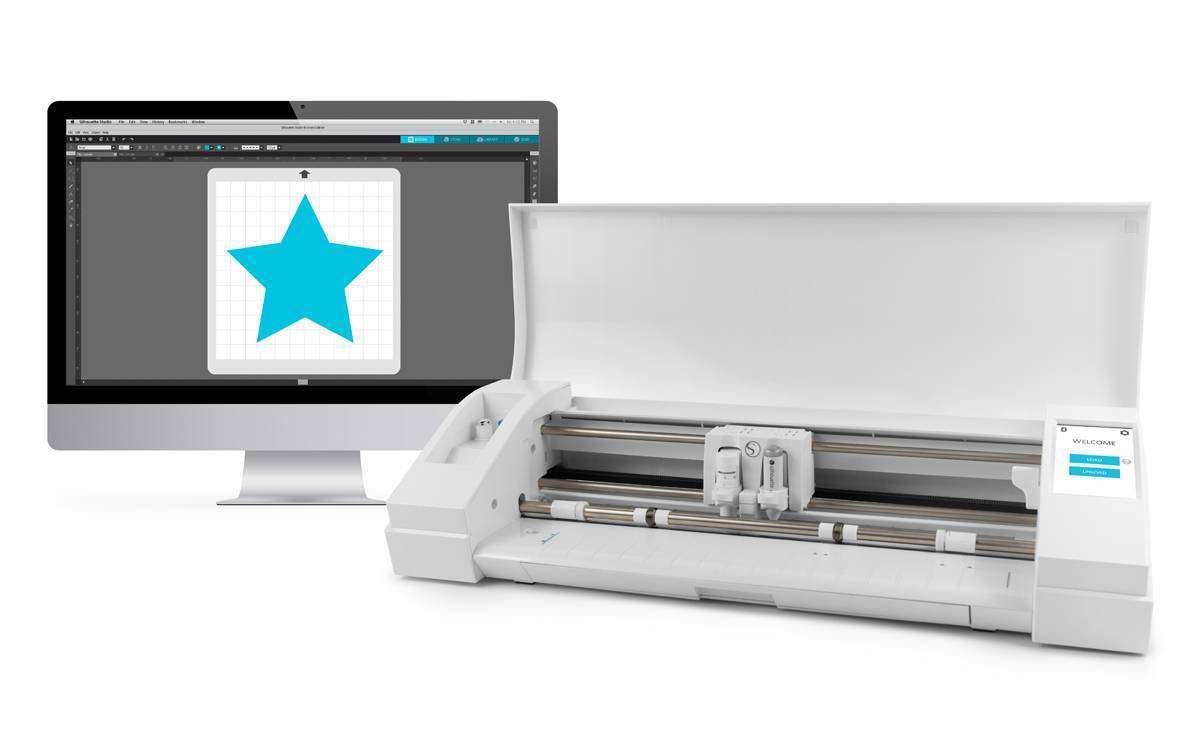
There are many options for making crafts, but Silhouette Cameo 4 is among the best machines. Silhouette Cameo offers a wide series of machines such as Silhouette Portrait, Silhouette Curio, Silhouette 3&4, etc. I have made many projects using the Silhouette machine, and I will share one project in this blog. I will also introduce Silhouette Cameo machine 4 and what features will help you prepare your first project. So, let’s start to learn how to cut on Silhouette Cameo 4.
Introduction To Silhouette Cameo 4As you already know, Silhouette Cameo 4 is a series of Silhouette machines used for cutting various materials for your projects, including vinyl, cardstock, leather, balsa wood, etc. It may feel a little intimidating to make something with your Silhouette Cameo 4, but with a proper guide, you can make anything easier. When we talk about making the project, we should start with a basic thing. This is why we will learn how to cut a paper with Silhouette Cameo.
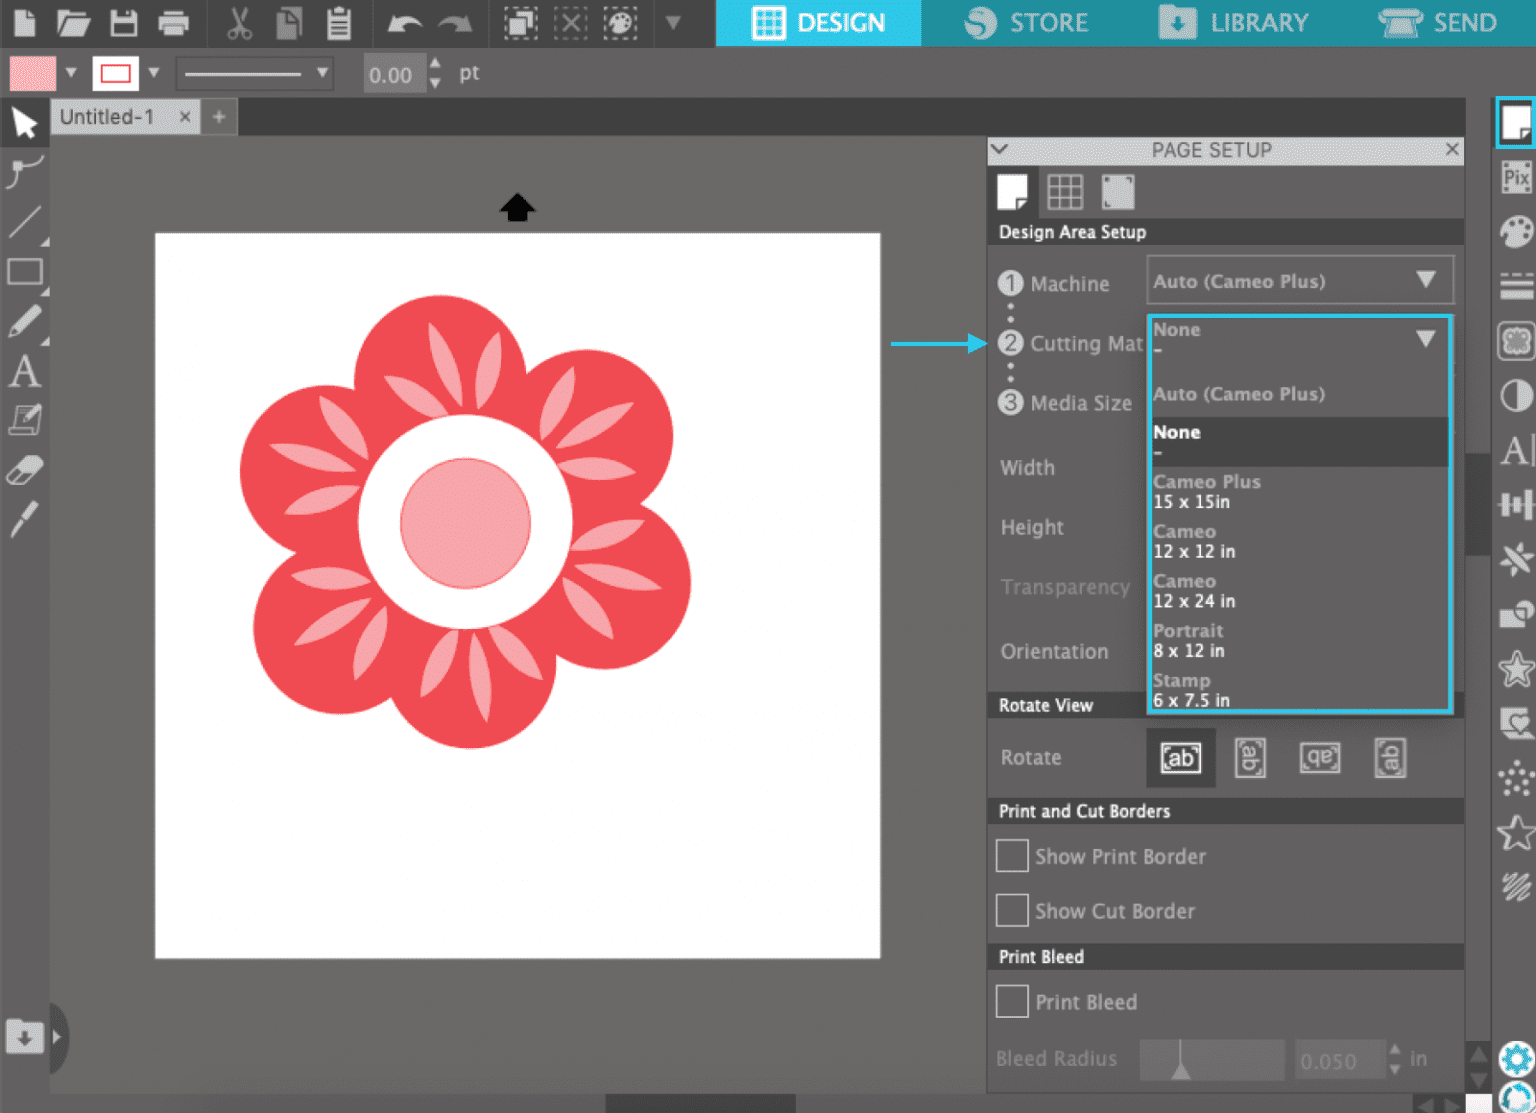
How To Cut With Your Silhouette Cameo 4 Machine?Typically, the Silhouette Cameo 4 has three cutting types- regular cut with a mat, kiss cut without the mat, and pop-out cut without a mat. Hence, there are two ways to cut things- with a mat and without a mat. To get started, click the cutting mat dropdown in the Page Setup window and adjust mat settings. To use a mat, pick the size in the list; likewise, to cut without a mat, select none. Then, you will have to select the type of matless cutting in further steps. While cutting without a mat, ensure your material fits between the rollers on your machine.
 Adjust Cut Settings
- First, click the Send tab to adjust cut settings.
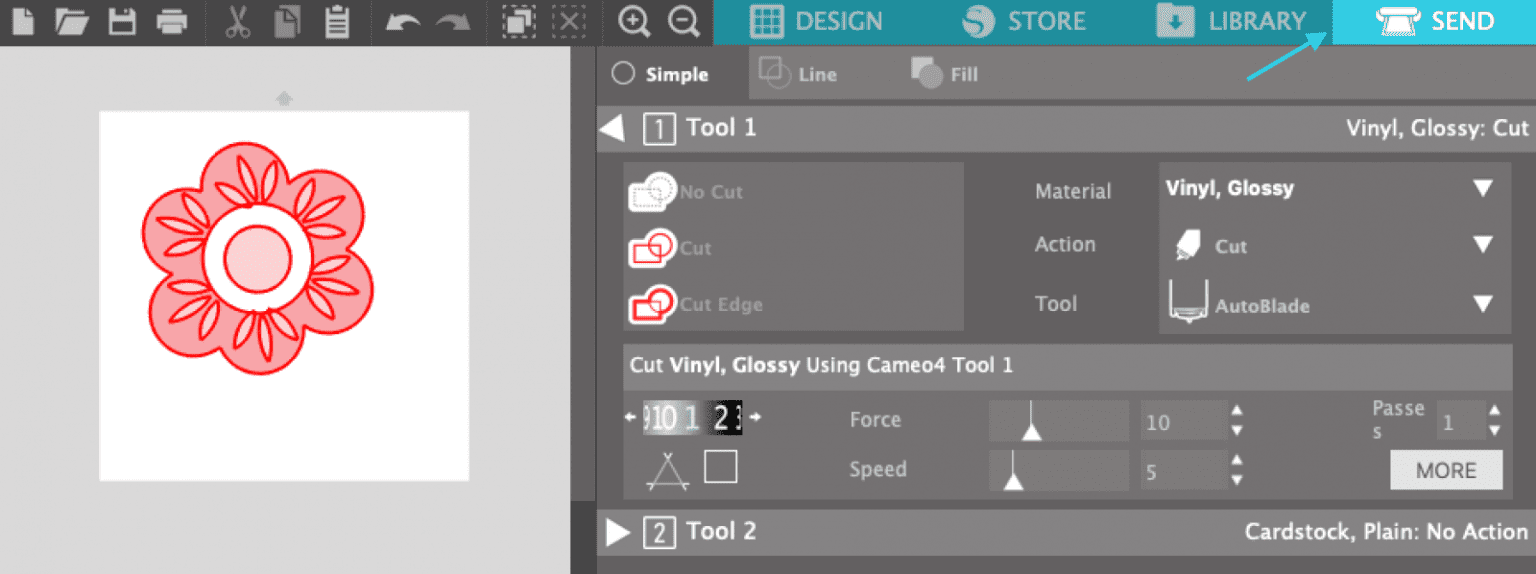
- Pick the material to be cut.
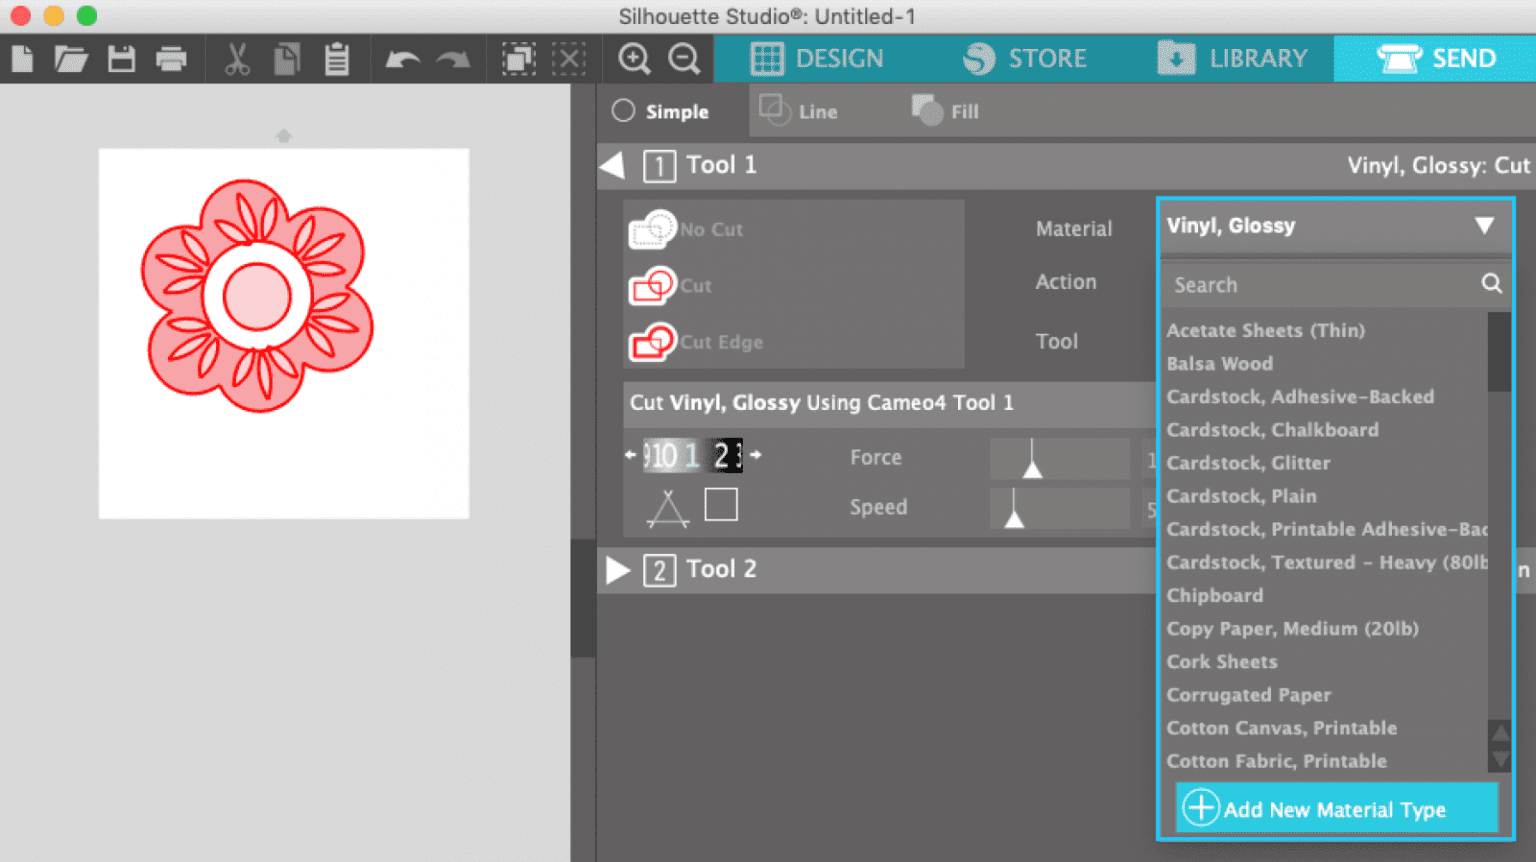
- Then, select the Action and Tool. The action and tool are autodetected in the Cameo 4. However, if they are incorrect, you can change them following the dropdown list.
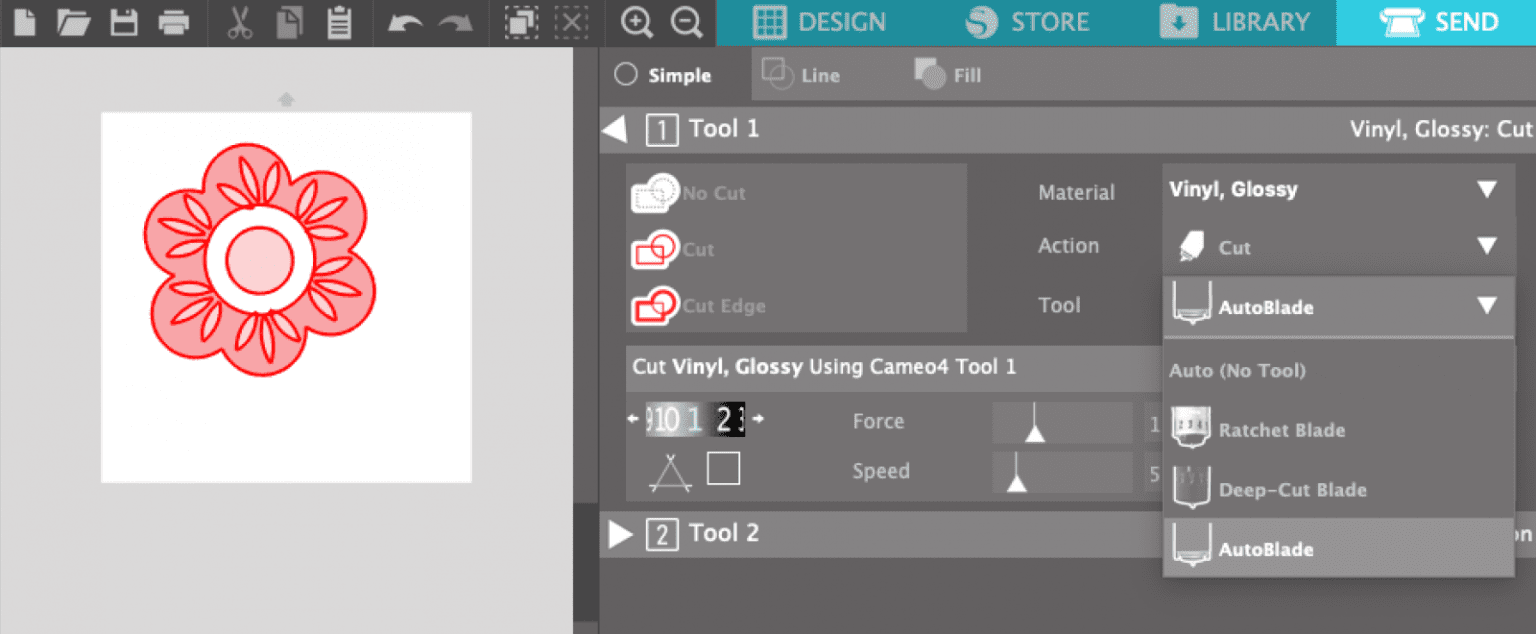
- The cut settings will be adjusted according to your material, action, and tool selections.
- In the case of a blade, you will have to adjust the settings manually. Change the blade to the required setting and put it into the machine.
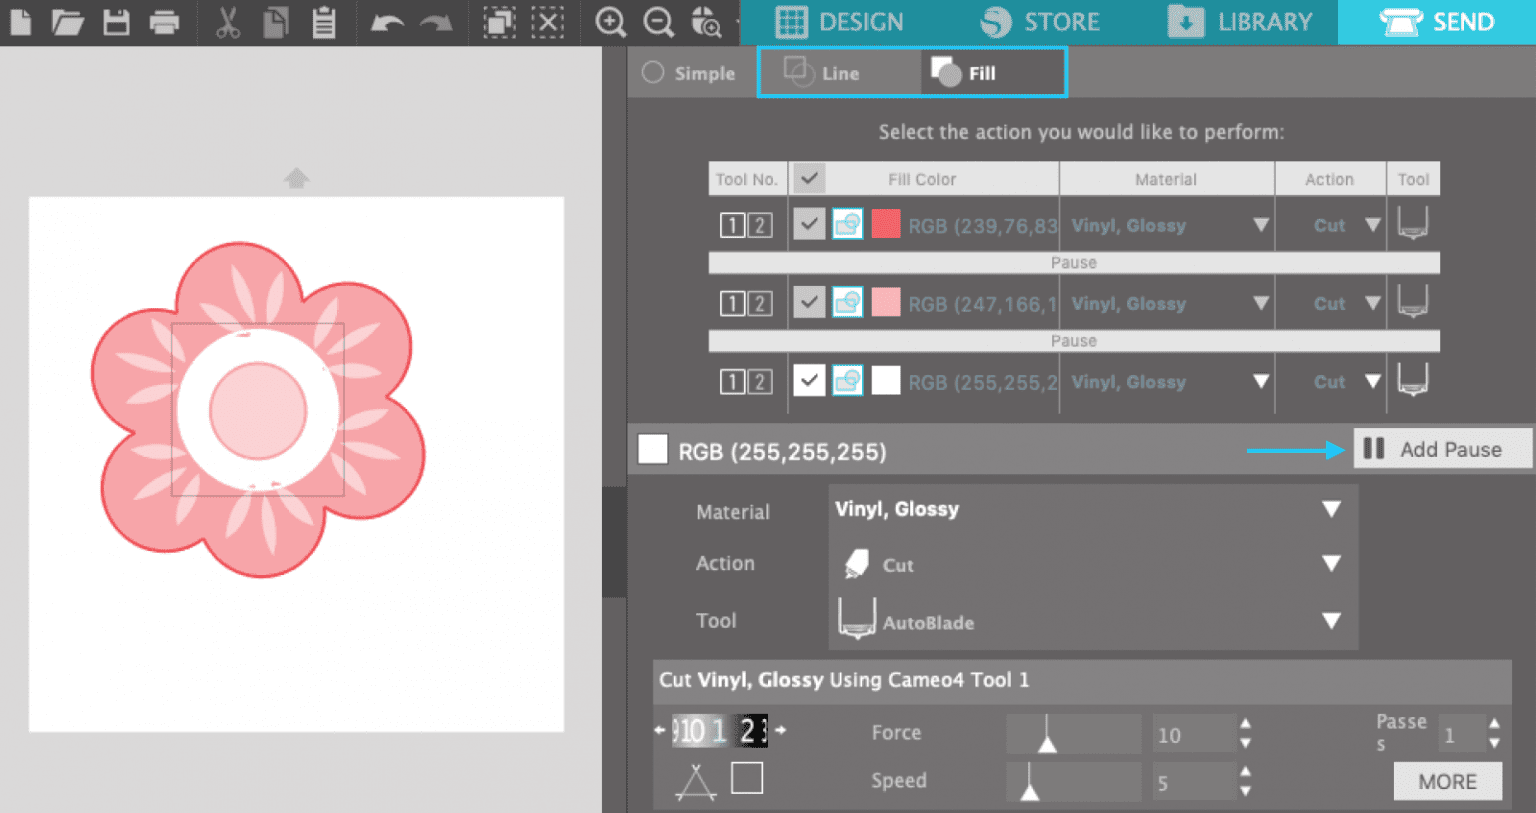
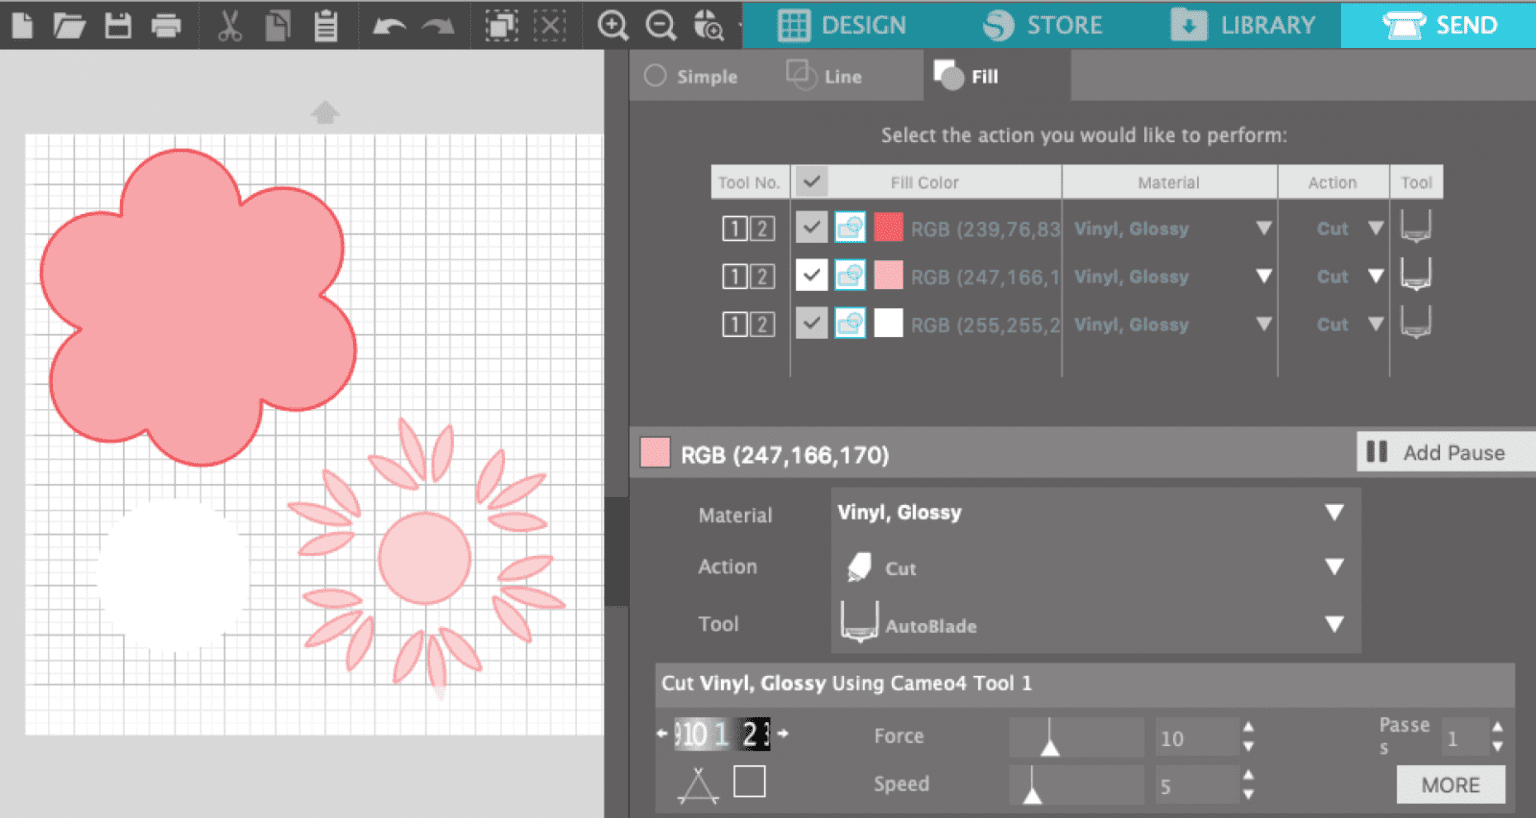
You may have to cut by line or color if your design combines more than two colors or materials.
- In the Send Panel, click the Line or Fill tab.
- Then, you will see each line or color in the list.
- Now, carefully check the materials and actions for each color.
- In order to cut each color individually, take a pause after each color so you can change the material.
- Once you have loaded your first color into the machine and started cutting, the machine will stop after it finishes each color and lets you remove the material.
- When you change the color and load it into the machine, click Resume. Repeat this same procedure with each color.
- If you need to cut all pieces together, put the material on the mat to let them match the colors in the Silhouette Studio.
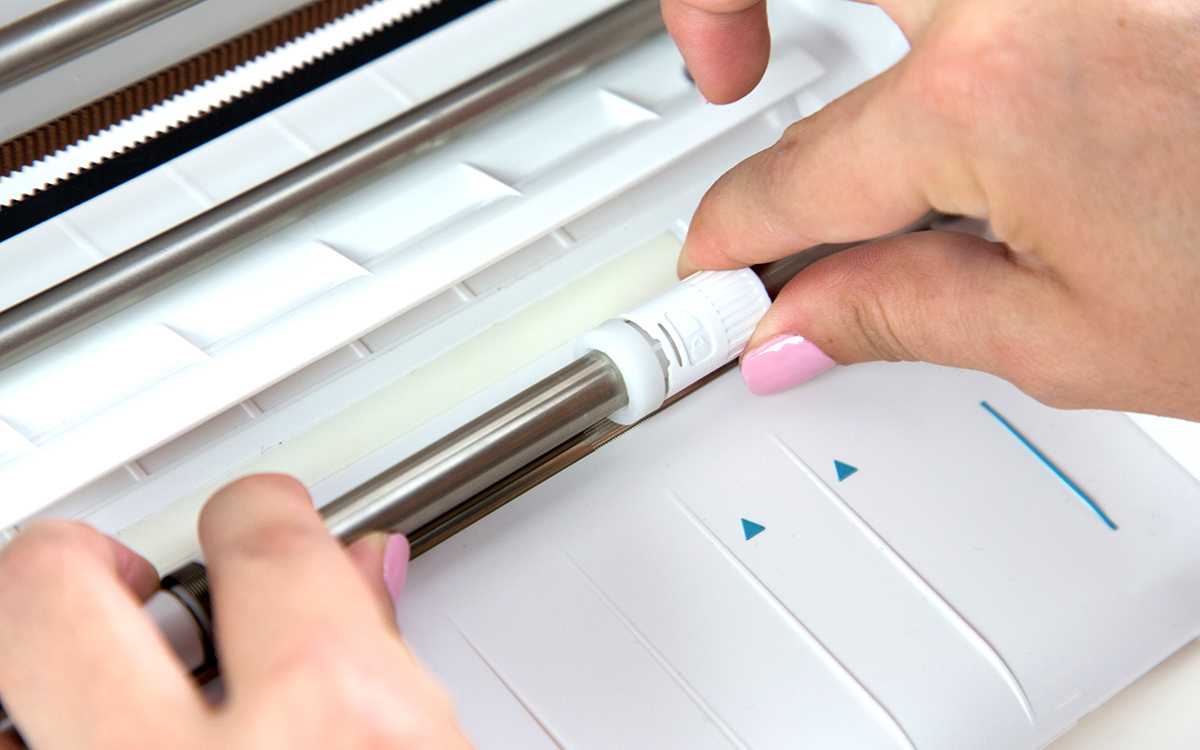
 Load The Machine
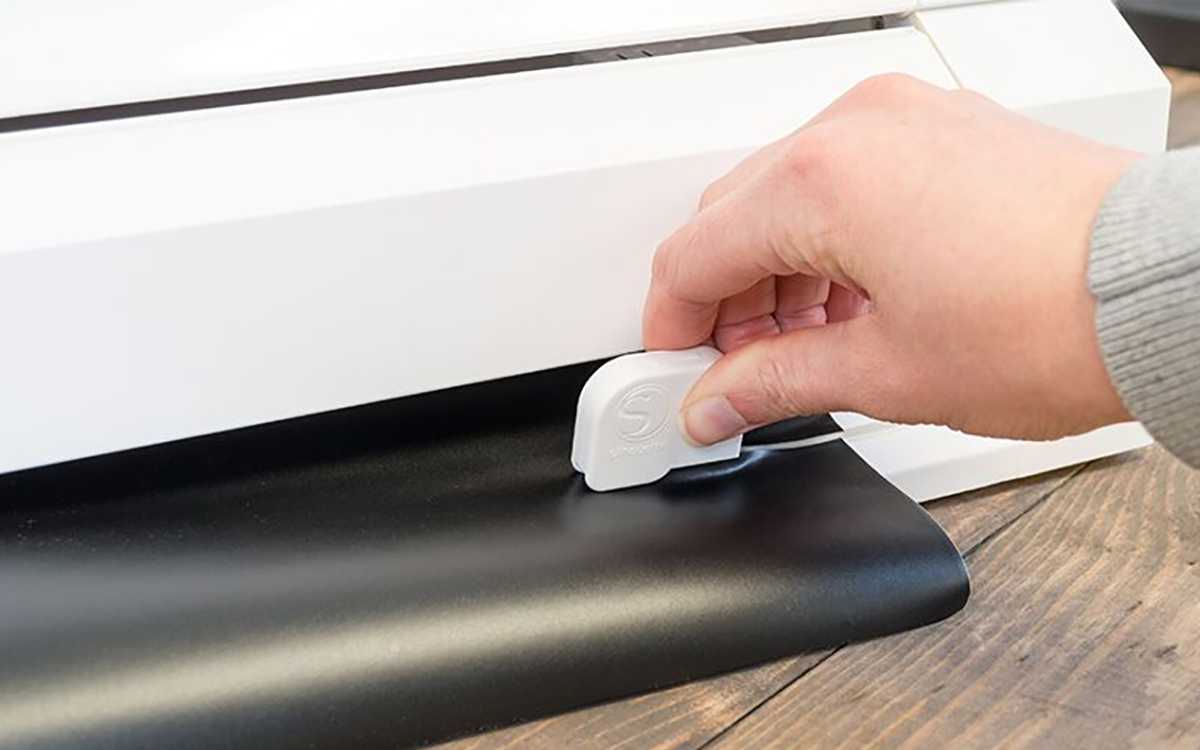
The Silhouette Cameo 4 rollers come set for the 12-inch mat. However, you can adjust the rollers to the width of your project and ensure that the machine will grip your material completely for cutting. Then, adjust the machine releasing the lock lever on the right and adjusting the center rollers. After that, lock the lever again.
- If you are using a mat, put your material on the mat so that it aligns with the grid in Silhouette Studio.
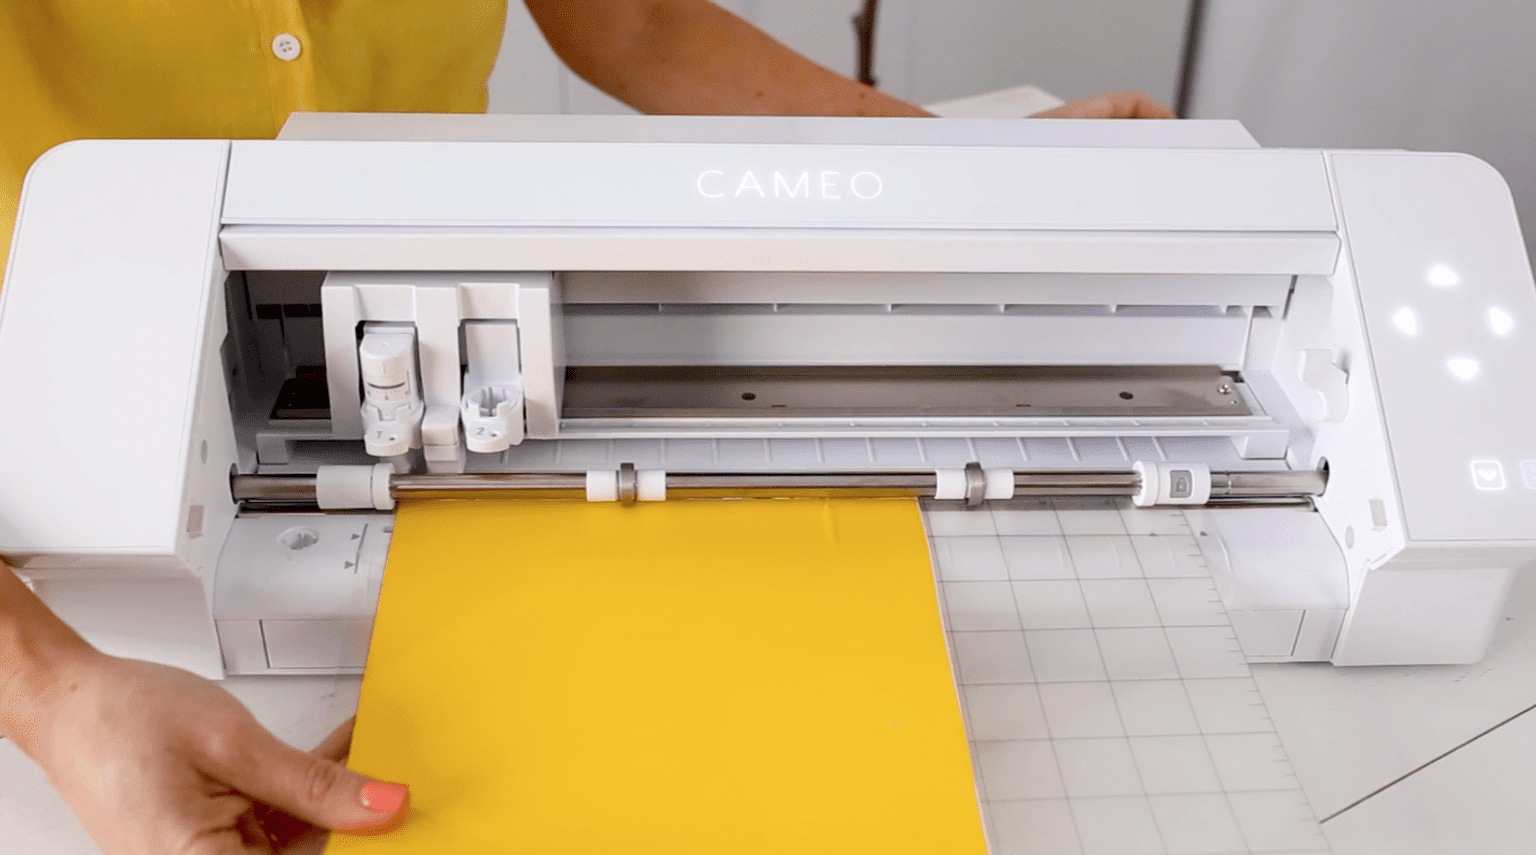
- Now, load your cutting mat or material, aligning it with the load line indicator on the left and placing it against the roller.
- Then, press the load arrow.
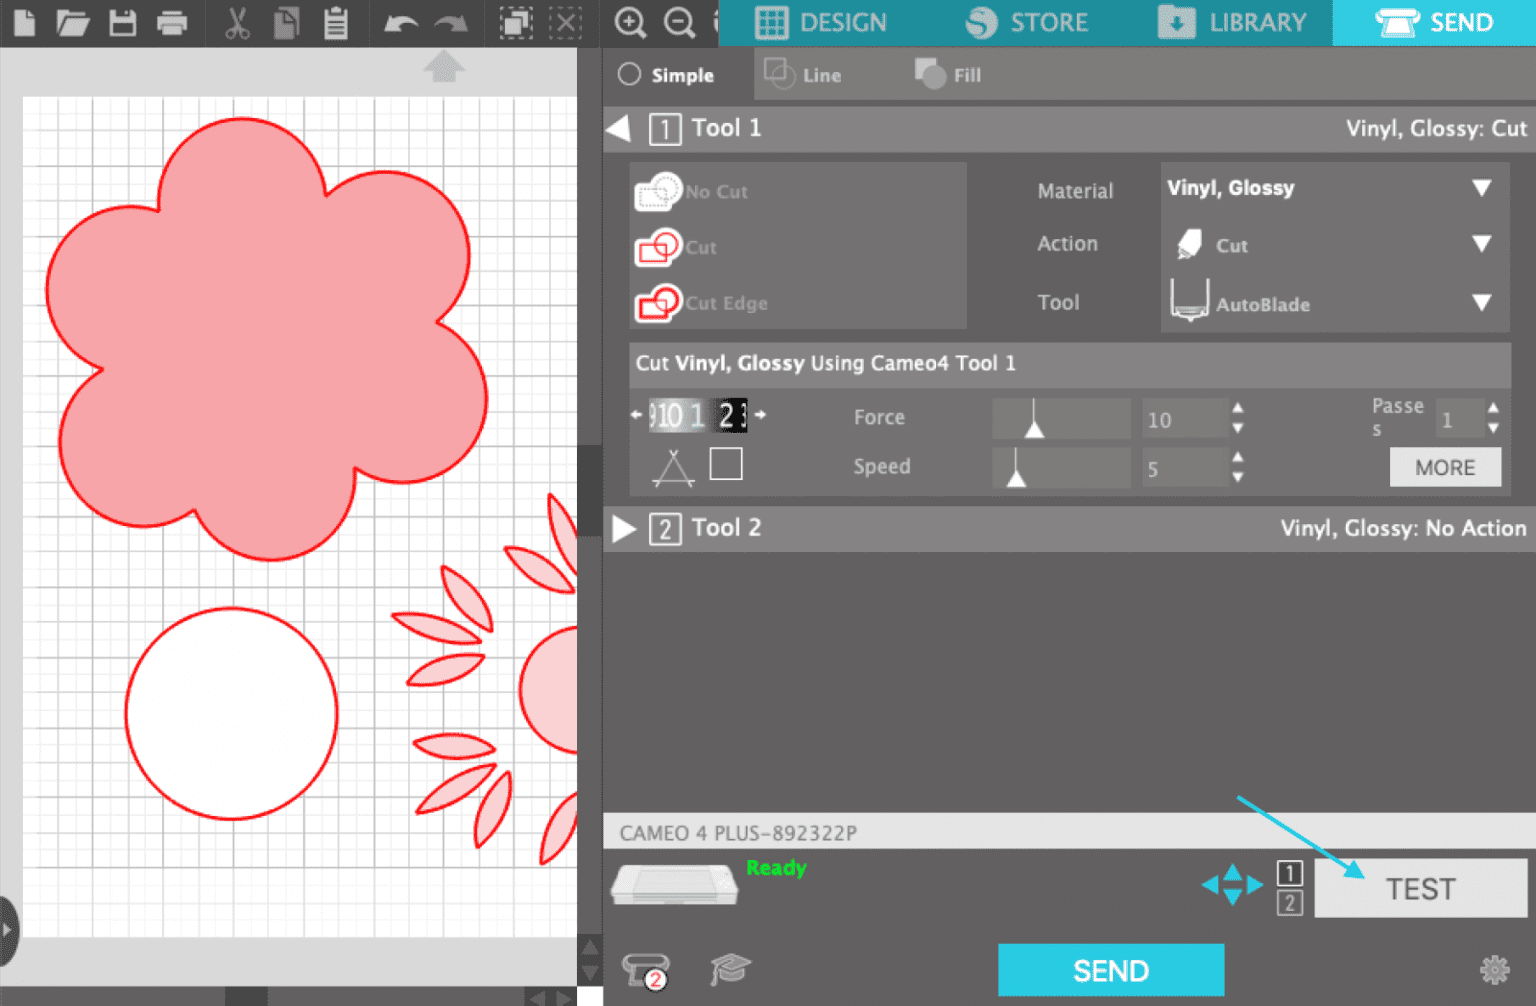
Before you send the cut job, you should take a test cut to ensure your settings are correct.
- First, click the Test button.
- Now, the machine will cut a small square and triangle from the top corner.
- Then, unload your material and adjust the settings if required.
- After that, reload the machine.
- Now, click the send button to start the cut job.
- Once the cut is complete, tap the unload arrow.
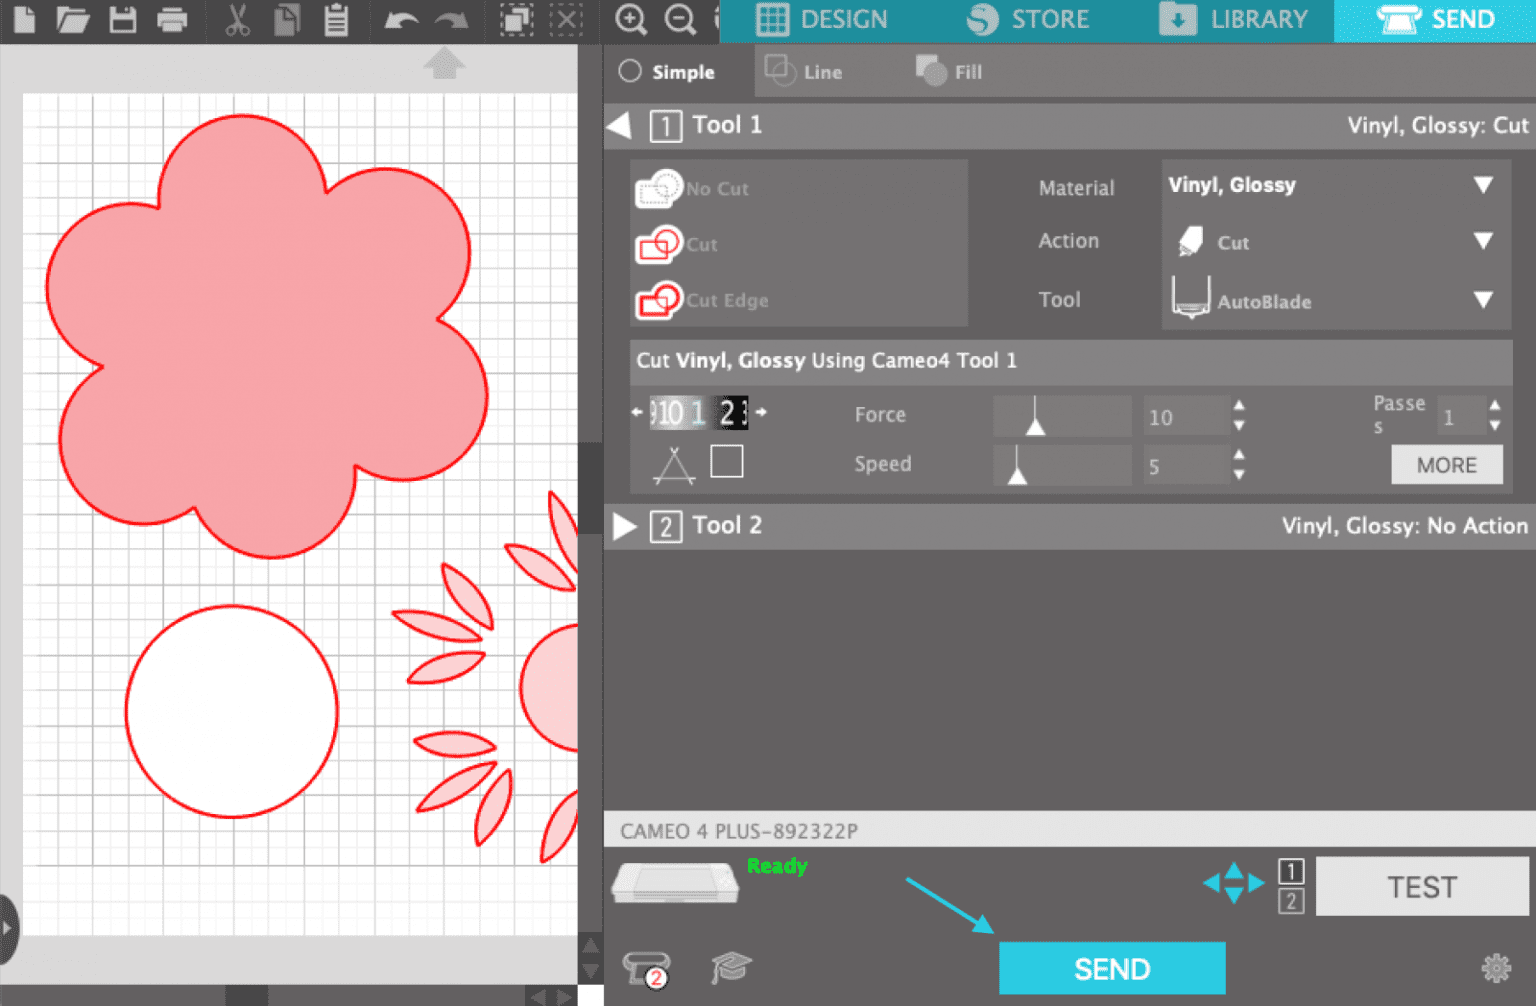
Finally, you can apply the cut material to the surface. I hope this small guide helps you understand how to cut on Silhouette Cameo 4 to cut paper or any material you want.
FAQsCan I Cut Wood With Silhouette Cameo 4?Yes, you can. Thanks to the new kraft blade that lets you cut hard materials like wood with Cameo 4. This tool is exclusive to cutting thicker and denser materials such as balsa wood chipboard and felt or faux leather.
Will I Need A Laptop For A Silhouette Cameo 4?Yes, you will need a laptop or a computer to connect to your Silhouette Cameo 4. This is to send the cutting jobs and adjust the settings in Silhouette Studio, a software that is used for making designs and sending the command to the Silhouette Cameo 4.
Can I Use Silhouette Cameo 4 For Embroidery?Cutting fabric is a breeze with Silhouette 4 with the rotary blades, and you don’t require a stabilizer on your fabric while cutting. Hence, the machine can be the best tool for embroidery.
Visit Site – Silhouette Cameo
Silhouette America Setup
Silhouette Studio
Silhouette Cameo 4
silhouette.com/software
Source :- https://silhouette-machine.com/how-to-cut-on-silhouette-cameo-4-a-tutorial-for-beginners/
Cricut Design Space is a fantastic software used with your cutting machine. Here you’ll get all the information on Cricut Design Space Software download. First, you must download and install the Cricut design space to use your device. You were both installing the Cricut design space app free for iOS and Android.
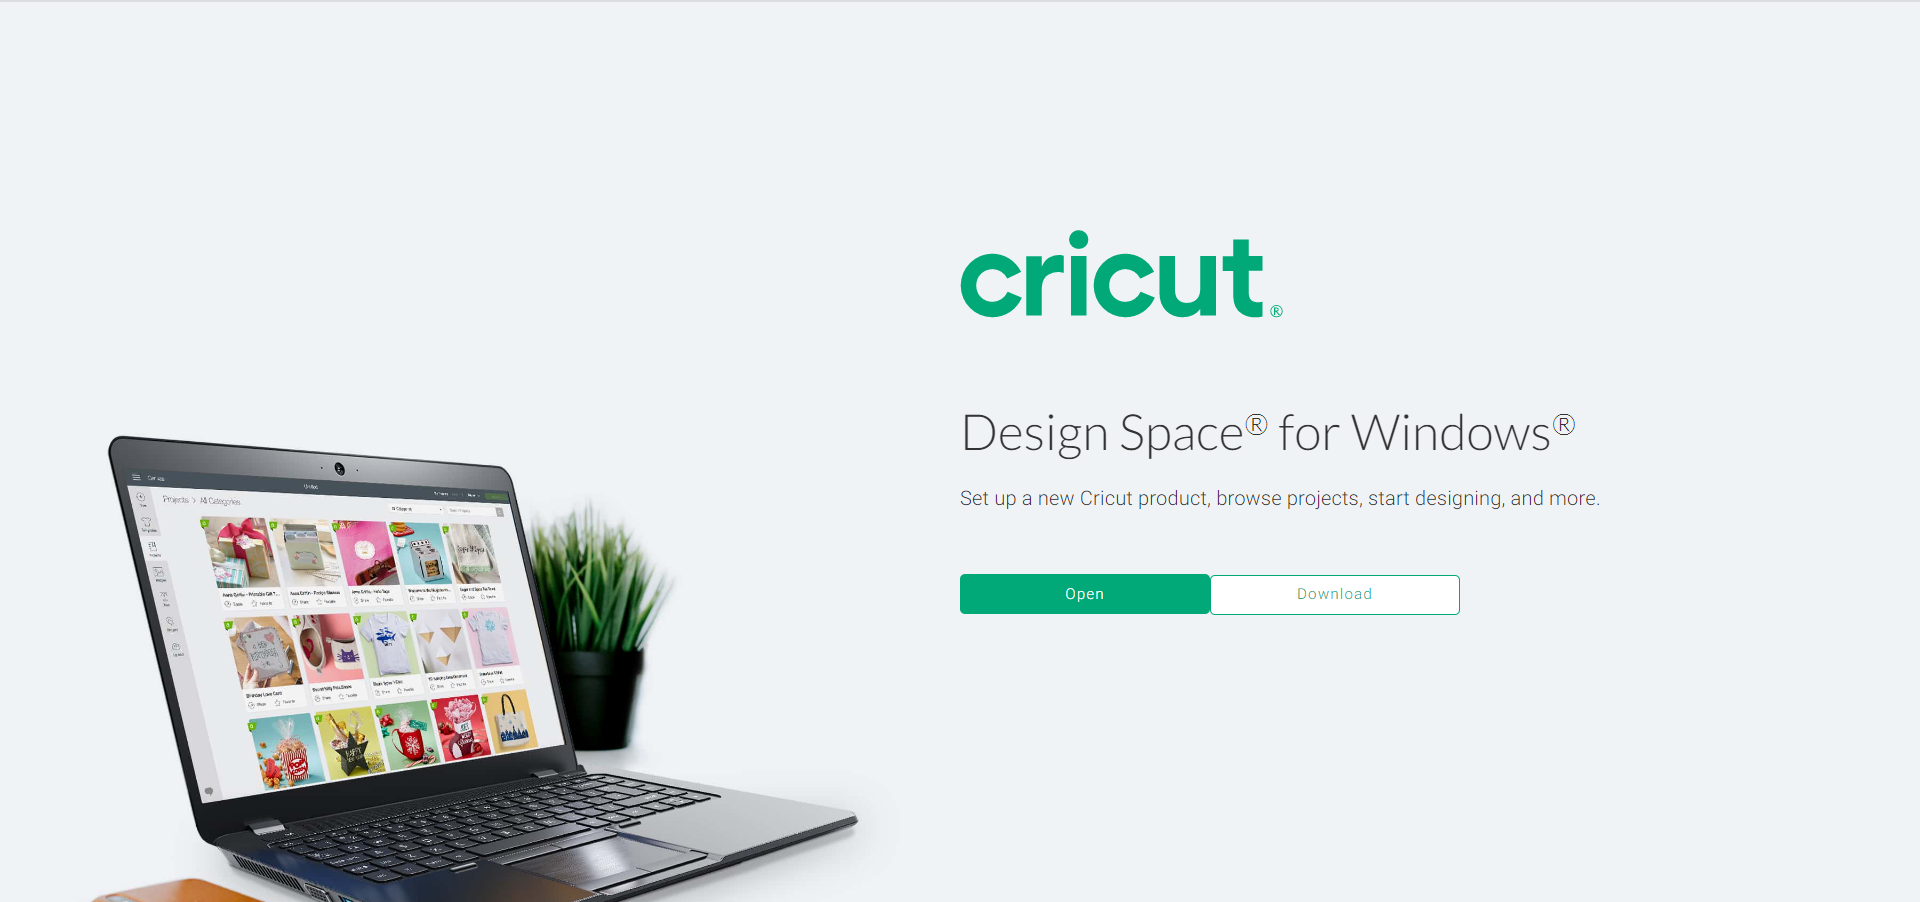
Users can set up a new Cricut machine with the Cricut Design Space Application. Cricut Design download can work as you expect. Otherwise, you can open it from your computer’s tool dock to the taskbar using a web browser. A new offline feature allows you to create designs anytime, anywhere, even with an internet connection. Also, it will launch more exciting features later.
What is Cricut Design Space?Cricut Design Space software lets you use your Cricut Design Space. You can select the design and upload it that will be made with your Cricut. Cricut is the digital design Application that sets up and lays out projects.
In the guide, we’ll explore how to download Cricut Design Space for free. It works with all Windows, Mac, and Android too. You’ll get tips on getting the best out of your design experience. It is elementary to install the Cricut Design Space. So learn here about how to install Design Space download.
 Steps for Cricut Design Download on Windows
Cricut Design Space software can be installed from its official website. Go through your browser and search for Cricut’s official website. It will automatically work with Mac or Windows systems. Generally, we suggest downloading from Google Chrome for this installation. With Windows download, click on the download box and download it.
- Open your internet browser and go through its official website.
- Download status will be shown at the bottom of your browser’s screen. When it is completely downloaded, click on the install and wait for the installation process.
- Windows will ask if you trust the Application, you have to select the option of trusting the Application.
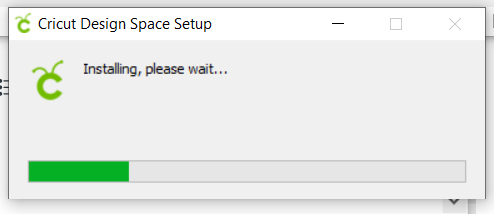
- Next, the setup window shows you the installation progress.
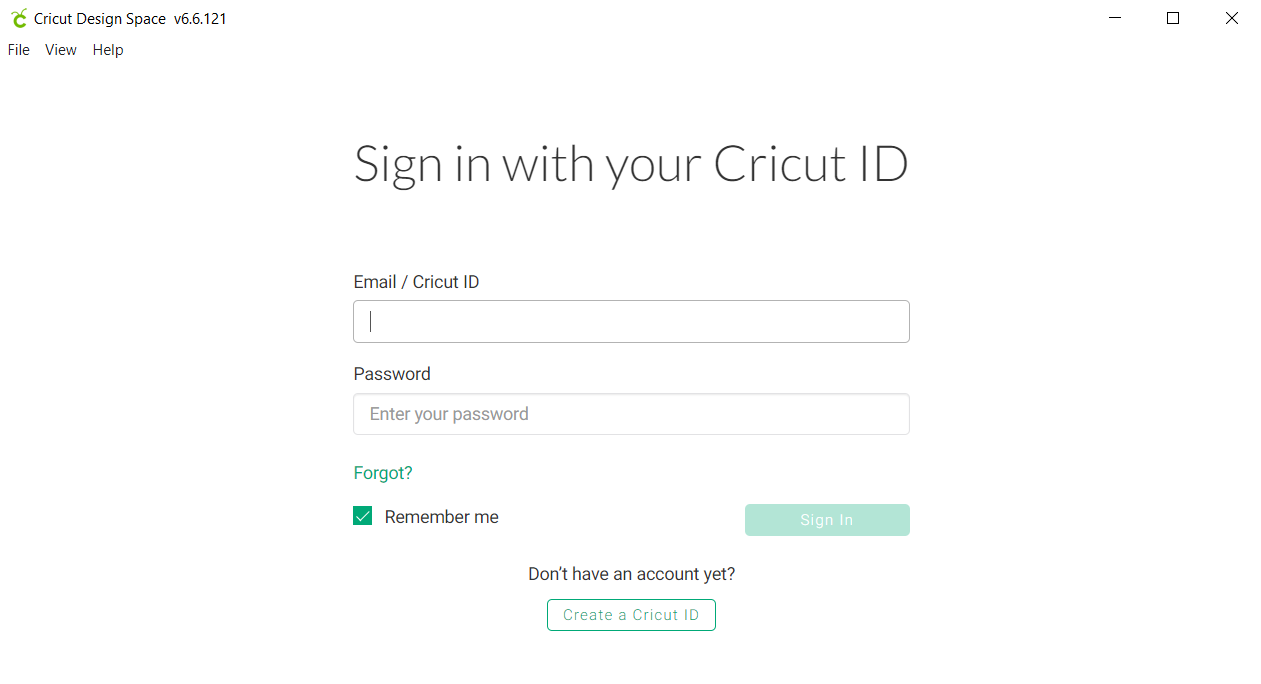
- Next, sign in with your Cricut ID password, and if you don’t have a Cricut ID, create a new account.
To download, install and launch the Cricut Design for the desktop on your Mac.
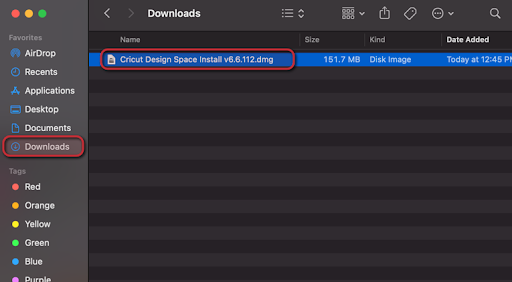
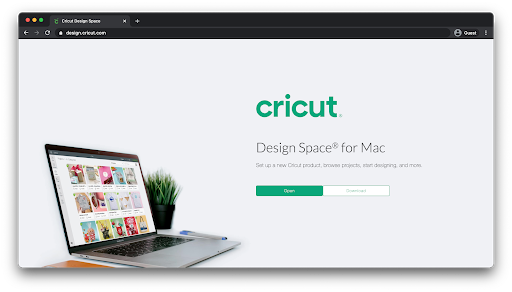
- Open your internet browser and navigate to its official website Cricut.com/setup.
- Choose download, the screen, and it will automatically show the application file is downloaded. It will look different to every browser.
- After downloading, click the install option and wait for the installation process.
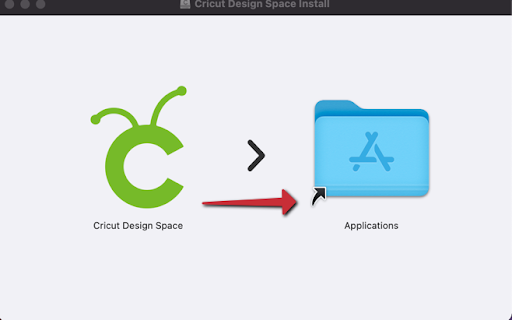
- Drag the icon of Cricut into the application folder for installation. The Design Space for the system gets added to the applications folder.
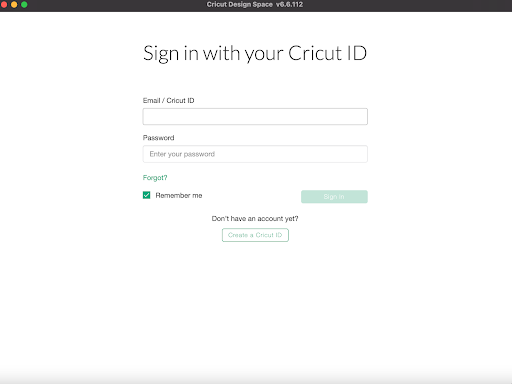
- The Mac might ask you to open the Application already downloaded from the internet. Select to continue.
- Then, sign in with your Cricut ID account.
- Now, enjoy using Cricut Design Space for your desktop.
Users need help with the steps to Cricut Design download and install. You can get all the information about Cricut Design Space in this post. If you’re new to installing the Cricut Design space in your Windows, you can follow given these easy steps. Cricut Design Space is a great graphics editor fully compatible with Windows. Installing the Design Space is a simple process; users can easily download it after installation. After the Cricut Design download, users can easily use the program.
Frequently Asked QuestionsQuestion 1: How Do Cricut Machines Work?Answer: Cricut machine cuts all sorts of designs from the material as paper and card stocks. It also uses small blades to cut the design from the sheet of paper or form other material. Create any design by Cricut, then send it to the Cricut cutting machine by Bluetooth or USB. It cuts it out using that small, precise blade.
Question 2: How do I set up the Cricut machine on Windows and Mac?Answer: You can follow the steps to cricut set up on Windows and Mac:
- Ensure the Cricut machine is correctly connected to the power supply, then turn it on.
- Connect the Cricut machine to your system with a USB cord.
- Go to Cricut’s website and confirm by Cricut Design download.
- Next, create an account and set up the machine.
- By this, you can set up a Cricut machine on Windows and Mac.
Visit Site- cricut.com/setup
www.cricut.com/setup
cricut setup
cricut design space setup
cricut.com setup mac
cricut.com setup windows
Source :- https://cricutsoftwareapp.com/cricut-design-download-on-windows-mac-complete-guide/
Cricut manufactures computer-controlled craft and cutting Cricut machines. They design these machines specifically for DIY enthusiasts, designers, and artists. There are several models that Cricut offers. Most older models are compatible with cutting over a hundred-plus materials.
The newer models can cut more than 300 different materials. Some common materials they can work with are paper, vinyl, iron-on transfers, and more rigid materials like leather and wood. This blog will look at Cricut Wireless Setup for your Cricut device.
Bluetooth pairing with the Cricut devices is easy if you have a Windows System. Please look at the steps for the same.
- Before we begin with Cricut Wireless Setup, you’ll need to see which Cricut model you own. If you own Cricut models of Explore Air, Air 2 and Maker machines contain an in-built Bluetooth module. But if you have either Explore or Explore one device, they require a Wireless Bluetooth Adapter.
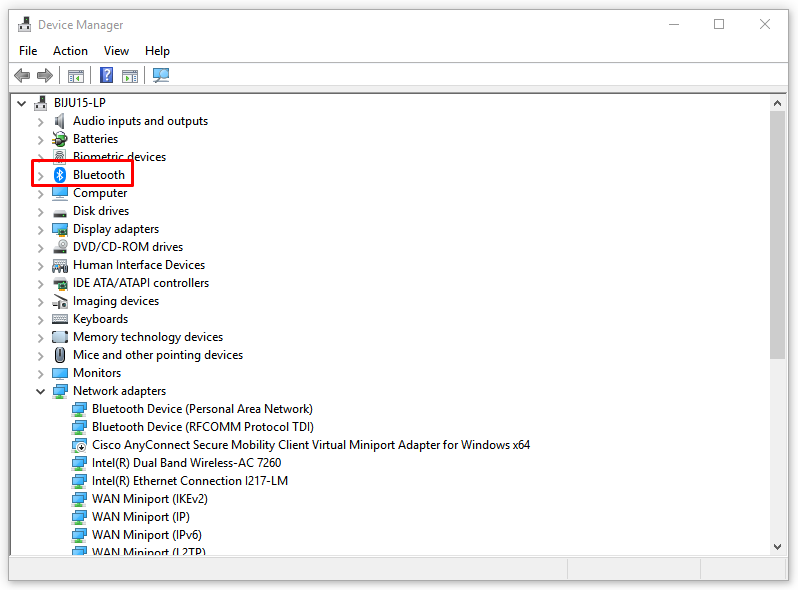
- The next step is again to confirm whether your Windows system enables Bluetooth. So, let’s check it. You have to go to the Device Manager on your Windows system and see if Bluetooth is on the list. If Bluetooth is on the list, then your system is enabled with Bluetooth. Otherwise, it is not.
- When your system does not enable Bluetooth, you need to buy a Bluetooth Dongle. This device helps in wireless connection via Bluetooth.
- After ensuring Bluetooth availability, you must keep both the devices, i.e., Cricut machine and PC, within the 10-15 ft range between each other. Now we move to the next phase in Cricut Wireless Setup for windows.
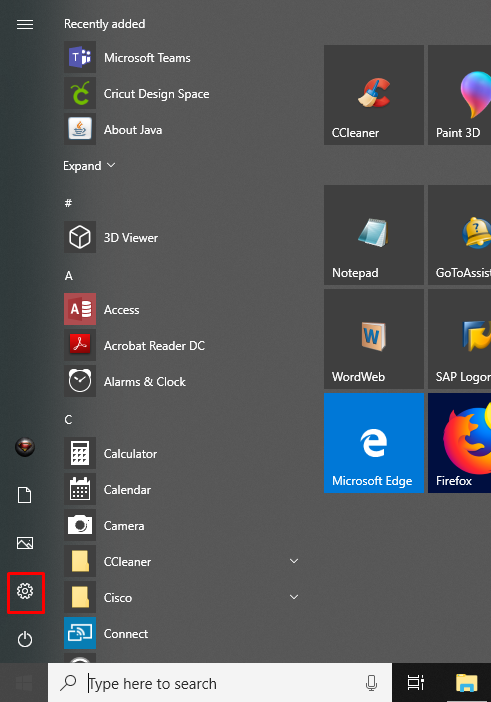
- Next, you have to open the Settings of your system from the Start Menu.
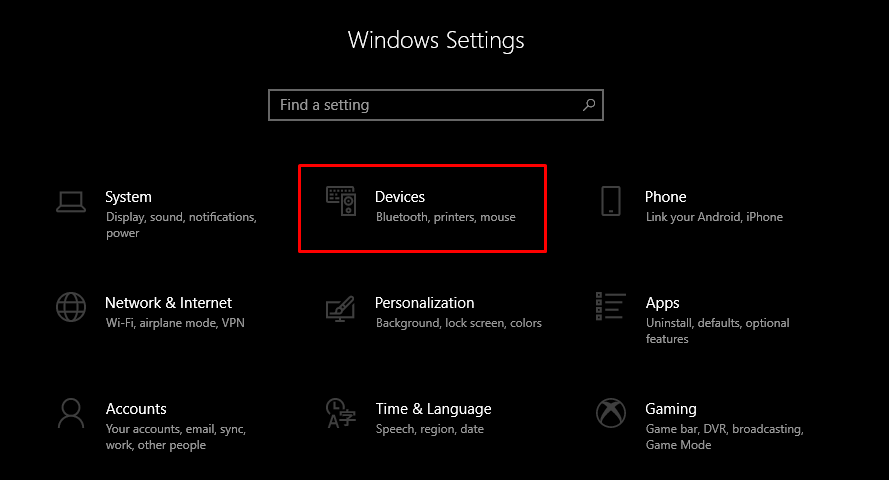
- After the Settings window opens, you must go to the Devices section.
- Later, choose Bluetooth and Other devices. Then start your system’s Bluetooth in the same window.
- Once the Bluetooth is ON, you must open the Add a Device by selecting Add Bluetooth or Other Device.
- Next, select Bluetooth, and the system will search for nearby Bluetooth devices.
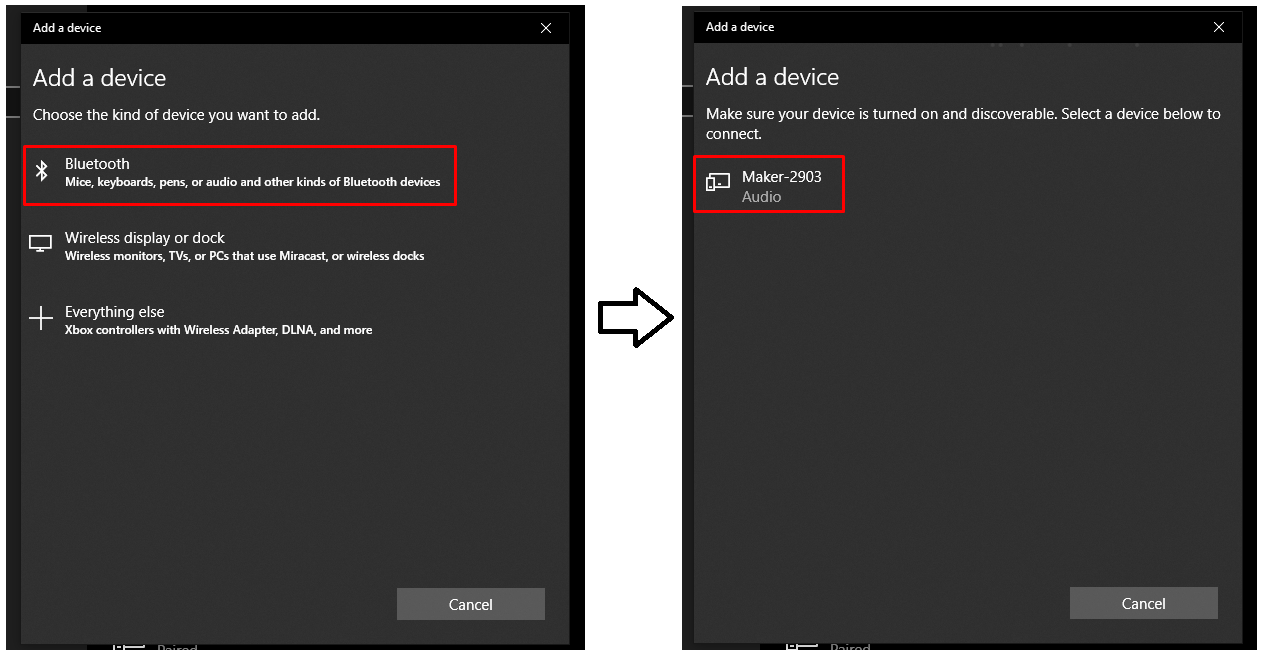
- After your Cricut device name pops up in the list, select the device to start the pairing process. This is the first step of Cricut Wireless setup for Windows computers.
- Sometimes, the system can ask for a PIN code and then type 0000 as a PIN. Then choose to Connect.

- The last step will end the pairing process. Pairing via Bluetooth is finished between the System and Cricut device.
Bluetooth pairing with the Cricut devices is easy if you have an Apple Computer or a MacBook System. Please look at the steps for the same.
- Before beginning with Cricut Wireless Setup, you need to see which Cricut model you own. Cricut models of Explore Air, Air 2, and Maker machines contain an in-built Bluetooth module. But if you own either the Explore or Explore one device, they require a Wireless Bluetooth Adapter.
- The next step is ensuring your Apple system is enabled with Bluetooth.
- If your Apple Computer does not have Bluetooth, you need to buy a Bluetooth Dongle. This device helps in enabling the Bluetooth connection.
- Once you have ensured Bluetooth availability, go to the Apple Menu and then to the System Preferences. If the Bluetooth option is present in this window, then your Apple computer is enabled with Bluetooth. Further, keeping the Cricut machine and Apple Computer within 10-15 ft of each other would be best.
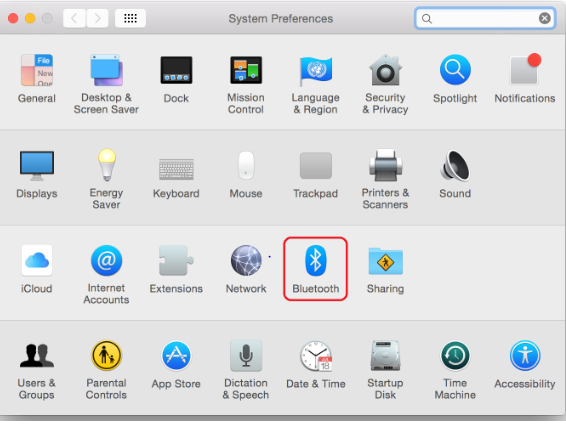
- Next step in Cricut wireless setup for Apple. Then, you need to open the Apple Menu of your Apple computer/MacBook.
- After the Apple Menu window opens, you must go to the System Preferences.
- Then, in the System Preferences window, select the Bluetooth option.
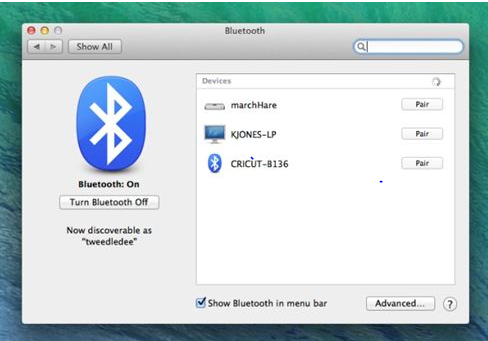
- It will open the Bluetooth window. If it is off, tap the Turn Bluetooth On option. Then the Mac computer will show the list of devices available. Here you have to select your Cricut Device to start the pairing process.
- This step may only occasionally appear, but your Apple computer may ask for a PIN code. Type “0000” as PIN and later choose to Connect.
- Now, Your Apple computer and Cricut device are paired by Bluetooth. This is the last step of Cricut Wireless Setup for Apple Computers.
To conclude, Cricut offers a range of devices having their unique features. If you own either Explore or Explore one device, you must also buy a Wireless Bluetooth Adapter. However, the Cricut models of Explore Air, Air 2, and Maker machines contain an in-built Bluetooth module. Cricut Wireless setup is easy, and it is beginner friendly.
Frequently Asked Questions- Is it typical for a Cricut device to appear as an audio device?
Yes. It is typical for a Cricut device to appear in the Bluetooth devices list as an audio device. You can use the Cricut device code to identify it as the device you want to pair or connect.
- Why my Cricut Device won’t connect to Bluetooth?
There are a few reasons that affect Bluetooth Connection. The first thing to do is by restarting your computer and Cricut device. If this doesn’t fix the issue, then you may need to contact the customer care service of either your System or Cricut customer service.
- Should I install Design Space after pairing the device with the computer?
Yes! You need to install Cricut Design Space from the official site. If you pair via Bluetooth, you won’t be able to work with the Cricut device without Design Space. So, Design Space helps in giving instructions to the Cricut machine from your computer.
Visit Site – cricut.com/setup
Cricut Design Space Setup
cricut explore air 2
cricut machine setup Mac,PC
cricut.com setup windows
cricut.com setup mac
Source :- https://cricutdesignspace-setup.com/cricut-wireless-setup-for-windows-and-mac-a-detailed-guide/
The Cricut machine has a simple setup on any device. You are free to set it up on Windows, Mac, iOS, or Android. Hence, you can choose your device and start setting up your brand-new Cricut machine. You can use Cricut on any device using a wired or wireless connection. You can compare a Cricut machine with a household printer. The only difference is that a Cricut machine can cut your materials into various designs using its sharp blades, which isn’t the case in printers. So, let’s discuss the Cricut machine setup.
You only need to Download and install Cricut Design Space software, an in-built software from Cricut that offers incredible features. Users can use it to design their projects with quality images, fonts, and pre-made designs. Cricut’s official website https://design.Cricut.com/setup allows you to download and install Cricut software.
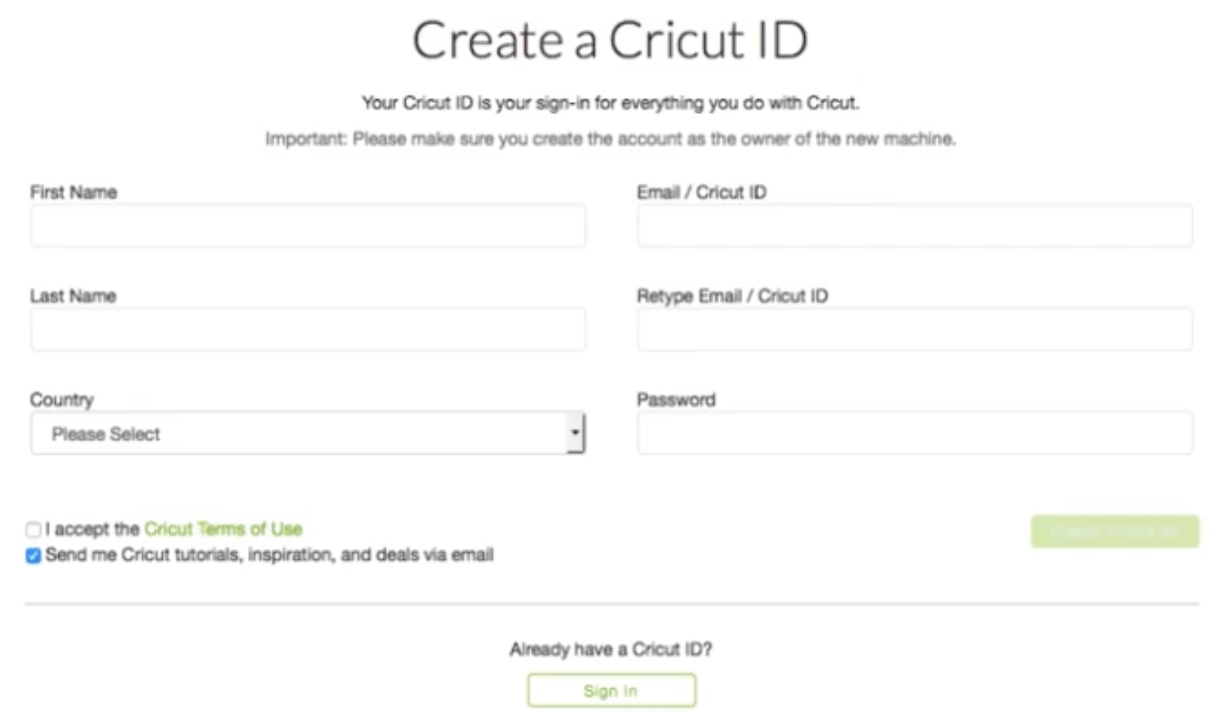
How to Create a New Cricut ID Account?It’s necessary to create a Cricut ID to access the machine. An ID allows you to access all the services and features included in the Cricut machine. The existing users can use their ID to sign in to their accounts. The beginners will have to spend an extra five minutes to create a new account to get started. So, let’s see the steps to create one.
- On your device, go to a safe web browser and search cricut.com/setup.
- Now, the browser will redirect you to the Criuct’s official sign-up page.
- Once you are in, tap on the Sign in option and click Create a Cricut ID.

- Now, supply all the necessary details like full name, email address, etc.
- After that, you need to choose the country or region.
- Then, carefully read all the Terms and Conditions of the Cricut machine and tick the Agree option.
- When you click Create My Account, you will be registered as a user.
- Lastly, Cricut will send you a confirmation email that your account has been created successfully.
You can check your email to confirm. Finally, your account has been created, and now you are good to go with the Cricut machine setup.
How to Get Cricut Design Space?Before you set up your Cricut machine, you will have to install the Cricut Design Space on your system. This software is in-built into Cricut and allows you to command your machine through a system. So, in order to get the software, you will have to follow the mentioned steps.
- First, launch an internet browser on your Windows computer.
- Then, type cricut.com/setup in the search bar and then hit enter.
- After that, sign in with your Cricut user ID and Password in the given box.
- Select your Cricut machine’s name using the drop-down list.
- After selecting, tap the Download option.
- Now, wait until the Cricut software is completely downloaded.
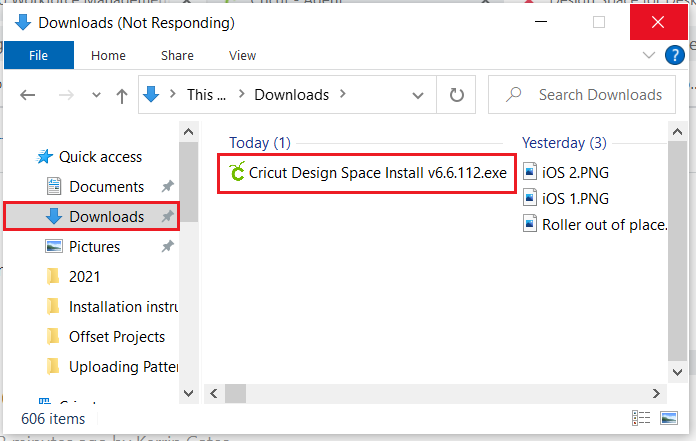
- Next, go to your Downloads folder and double-click the install.exe file to run the installation.
Finally, you have installed the Cricut Design Space software on your Windows system. Now, you are all ready to use the machine to start your first cut.
How to Connect a Cricut Machine to a Printer?The cricut machine also allows you to print your designs on a printer. So, if you have a printer, you should know this. Let’s see how you can connect a Cricut machine to the printer.
- First, get ready with the Design Space software by downloading it from cricut.com/setup.
- After that, log in using your Cricut ID.
- In case you are setting up your Cricut machine for the first time, create a new account first.
- Select your Cricut machine and click Download.
- Let the software download on your operating system.
- Then, double-click on the downloaded file to finish the installation.
- Now, you can use your Cricut machine for unlimited designs.
- Continue with plugging your Cricut machine and printer into a power source.
- Then, turn on your computer and connect to the printer via a USB cable.
- Either you can use Bluetooth connection to connect both machines.
- Lastly, your Cricut machine is set up successfully. So, get ready to enjoy all its features.
Now, you are all set to use your Cricut machine to create thousands of amazing designs and print them with a printer. There are numerous possibilities to use your Design Space.
ConclusionCricut machine setup needs the installation of Cricut Design Space software. After downloading it, you need to sign in to your Cricut account. If you don’t have an account already, make one. After completing signing in, you are ready to use your Cricut machine to create many designs. By using the printer and a Cricut machine, you can implement your ideas.
Also, the Cricut Design Space serves as the best source to get designs. It provides plenty of fonts, images, and designs to make your projects. Plus, the Cricut accessories help you to use the machine in the best way.
Visit Site – cricut.com/setup
www.cricut.com/setup
cricut setup
cricut design space setup
cricut.com setup mac
Source :- https://cricutdesignspace-setup.com/how-to-setup-cricut-machines-on-any-device/
All crafters can use Cricut Design software to make their imagination come true. Before diving into the world of electric cutting machines, it’s obvious to know about the resources and software provided to them. Cricut Design Space is programming software that supports all the operating systems of the cutting machine.
If you purchase any version of this cutting machine, then getting this app should be on your list. Apart from that, this app/software can be downloaded for free for PCs & mobile devices. Let’s talk about how one can do the design work to create the projects.
How to Download Cricut Design Software on Mac?Nowadays, most people prefer to use Mac as an electronic device to create various designs on the Cricut Design Space. Moreover, a strong internet connection is required while completing the process smoothly. To do that, everyone is supposed to follow the steps listed in the forthcoming pointers:
- Get going through the process by opening the search engine of your choice.
- Note down Cricut Design Space inside the respective section.
- On the new web page, tick the “Download button”, and the file will start getting downloads.
- Double-click the file on the left side at the bottom left side of the screen.
- You’ll also get the downloaded file by opening the Downloads folder on your system.
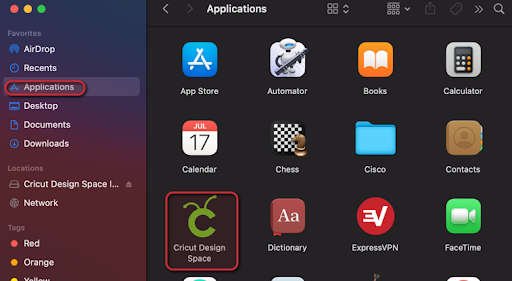
- Select the software symbol and shift it to the Applications folder.
- Following this, go to Applications and double-click to launch the app.
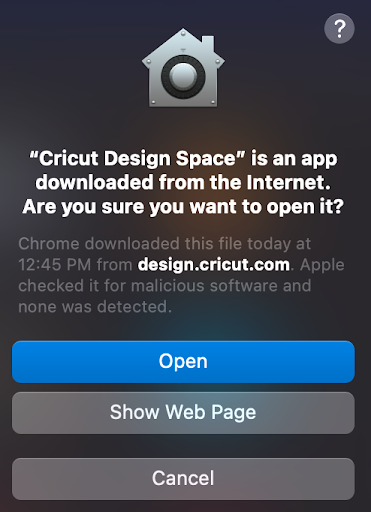
- Read the Mac notice on the screen, then press Open to move to the next step.
- You’ll get connected to the Cricut sign in with the official Cricut ID web page.
- Intending to get started by creating various projects, enter the details and press Sign In.
- Moreover, if you are a new user, create your account on the app.
Once you are done downloading the app on Mac, continue reading the article to get the software on iOS devices.
How to Download Cricut Design Software on iOS Devices?Further, getting the Cricut Design Space on Mac, one can easily get the respective app on their iOS devices by completing the process explained here:
- First, open your iOS device and press the App Store icon.
- Second, look for Cricut Design Space inside the app.
- Third, tick the Get button to start the app installation process. After that, you must confirm the download with your iTunes password (if prompted to enter).
- Next, any one of the options which you do want to read or press the X box appears on the left side of the screen.
In addition, after downloading/setting up the Cricut app on separate devices, we can collect info about designing various projects with the help of the software.
How to Create Projects on Cricut Design Software?After a few hours of getting the Design Space software, you can effortlessly create your personalized projects with the assistance of the tools & library available inside it. Though it becomes very easy to craft a personalized project with the assistance of the below-mentioned steps:
- In the opening stage of the process, sign in to the Cricut Design Space with your details.
- Also, you can connect directly to Canvas as the app remembers the sign-in details.
- After the app opens, select the New button appearing on the left side of the Canvas.
- At Canvas, you can add images, fonts, or ready-to-make projects per your preference.
- Moreover, you can use Cricut Access plans to make your projects more attractive and eye-catching.
- Apart from that, press the Save icon, and your design will be saved in the app folder.
- Lastly, you are guided to keep a copy of your project to ignore any trouble in future times.
As a conclusion with this post section, you are now permitted to create the project for various reasons (professional, personal).
FAQsQuestion: What is Cricut Access and Its subscription plans?Answer: With Cricut Access, one can get the authority to unlock the ever-growing collection packed with HD-quality images, fonts, and pre-prepared projects for different occasions. However, to become a member, one can choose from the plan provided to them, which includes:
- Free Trial
- Standard Plan
- Premium Plan
Answer: Cricut Design Space is a free app that should be paired with the electric cutting machine to get the exact project. You aren’t supposed to pay any amount before using the app. However, it’s important to download the app with all the instructions. At last, you are all set to start by creating your chosen project.
Question: What is the Monthly & Yearly fee for using Cricut Access?Answer: The users will get a 30-day trial while using Cricut Access. Moreover, the monthly fee while using the Cricut Access Standard plan is $9.99 & yearly fee is $95.88. However, the monthly amount is $9.99, and the yearly fee for the Premium plan is $119.88. Each plan provides its design perks & saving benefits to the user.
Visit Site – cricut.com/setup
www.cricut.com/setup
cricut setup
cricut design space setup
cricut.com setup mac
cricut.com setup windows
Source :- https://cricutsoftwareapp.com/what-is-cricut-design-software-and-how-to-use-it/
Cutting machines are popular in the market, and almost everybody is aware of them. The Cricut and Silhouette are both the best competitors against each other. However, it is a little difficult to tell which is best. Every user has this question when they need to choose one machine. The Cricut machines are dominant, but it doesn’t mean it lacks a rival. Silhouette has a good series of machine models, such as Silhouette Cameo, Portrait, Mint, and Alta, while Cricut has three main models- Maker, Joy, and Explore. If you are looking for the best craft machine from these brands, read this detailed review of Silhouette vs Cricut.

The Cricut Maker is the most advanced and latest addition. It is the most capable machine of its entire lineup. So, let’s discuss which would be your best choice.
Silhouette vs Cricut OverviewOn a serious note, we cannot say that one machine is 100% better than the other. Both brands have their own sets of pros and cons. Therefore, we have given a point-to-point explanation of both brands. Here you will find a guide that will help you decide which product is worth your money. If you cannot wait to know, let me break the suspense for you. Cricut Maker is the winner, if you want to know why read this article.
Size And WeightSize is an important factor in deciding the machines. However, size is subjective because every user may have a different approach to sizes. The Cricut Maker is usually larger and heavier than the Silhouette. On the other hand, the compact size of Silhouette is also an advantage for many. The users can carry it anywhere as it doesn’t take up much space. The good thing is that both machines have passed the test of time and are resistant to wear and tear.
So, if you want a huge machine, you should choose Cricut Maker, or if you want something lightweight and compact, stick to Silhouette Cameo.
Cutting SizeBoth machines have a decent cutting size for the crafters. However, there is still some noticeable difference. For instance, the Cricut Maker has a standard cutting size of 12 X 24 inches, While the Silhouette Cameo can go up to 12 inches X 10 feet due to its integrated roller. Hence, this feature is in favor of Silhouette’s Cameo machine.
Auto blade
Both machines have an Auto blade that works according to what you expected. Although both machines have this feature, the Silhouette Cameo is automated compared to the Cricut Maker, where you need to set it via the Cricut Design Space software manually.
The auto blade helps you automate the cutting process. Hence, you don’t need to set different parameters while creating a design. Also, the auto blade in Silhouette Cameo adjusts the cutting force of the machine due to its ability to recognize the material you are using for your design. But in the case of Cricut Maker, you will have to set the features manually.
Once again, the Silhouette Cameo takes the lead as its auto blade is automatic.
Dual CarriageThe dual carriage processing helps you save time by simultaneously speeding up the two processes. This feature doesn’t perform two processes simultaneously but in a sequence. Hence, you can save a lot of time manually loading machines and setting them for each step. The dual carriage feature is available on both cutting machines. Hence, both options are viable.
Working With Strong MaterialsMany users use cutting machines to handle paper and other materials of the same strength. Having one of these machines will save you from lots of work that involves manual tasks. At the same time, the other materials have better resistance, including mat board, balsa wood, and vinyl.
The Cricut Maker can work with multiple materials like balsawood and matboard with its powerful cutting force of 4000 g. But, there is a limit that the thickness of the material should not be greater than 2.4 mm. The Silhouette Cameo can cut a few thick materials. However, the process will not be as easy as when you try the same thing with the Cricut Maker machine. You will have to go through some trials and errors. Hence, you may need to run multiple passes to get the right design.
If you want to perform certain complicated operations like scoring and embossing, you can’ do it only with your Cameo; you will have to buy an additional machine such as Silhouette Curio. But, if you don’t want to carry more machines, Cricut Maker is suitable for you.
Cutting PowerThe Silhouette Cameo didn’t have the cutting power, and it could only offer 210 g of cutting power to the materials compared to the Cricut Maker, which has 4000 g of cutting power. But now, the Silhouette Cameo 4 has 5000g of cutting force and a clearance of 3mm. Also, it can handle thicker materials up to 3mm, while the Cricut Maker can only handle materials with a thickness of 2.4 mm.
NoiseThe noise level should be considered when choosing a machine, as not all users like to have a noisy machine. But this point can be ignored as most of the cutting machines have moving parts. Hence, they are not silent, but you will definitely find a difference between both the models we chose. The Silhouette family of cutting machines is noisy no matter which model you choose. On the other hand, the Cricut Maker is also noisy. However, it is quieter than its rivals.
Therefore, if you want to maintain a normal level of noise while using the Cricut Maker, avoid using the 2X speed because the 2x speed will increase the level of noise in the cutting machine.
ConclusionUltimately, you have to choose whether you want to go with the Silhouette Cameo or the Cricut Maker. The first question you need to ask yourself is, what are my expectations from this machine? Recently, Cameo 4 was released. But, the Cricut Maker can still handle more than drawing and cutting, such as embossing and scoring. At the same time, the Silhouette requires an additional machine for two operations, embossing and scoring. Also, the accessories for the Silhouette machine are more expensive. Hence, the Cricut Maker wins here.
However, if the noise level doesn’t bother you and you want a machine that can work with a 10 feet long sheet, Silhouette Cameo 4 is the right pick for you.
Visit Site – silhouette cameo
silhouette cameo 4
Silhouette Cameo 4 Pro
Silhouette Setup
silhouette cameo software
Source :- https://cameosilhouettecameos.com/silhouette-vs-cricut-complete-comparison-guide-2023/
